Background on Cantilever Spans
(click on any photos in post to see enlarged)
We participated in a school’s Family STEM/Science Night recently, which always ends up being a kick. Having families participate together and watching what happens is a blast. My cohort in science, Lou Loftin, who is the Science Learning Facilitator (I’m the STEM Learning Facilitator) where we work, took an idea he stole borrowed from a colleague last year, shared it with me, and we ran with it. Lou was running a, “How Many Drops Of Water Fit On A Penny” station, and I ran the, “Cantilever Span” station – it worked out even better than we imagined when we planned it. This would be an incredible classroom lesson that could stretch over several days to several weeks depending on just how deep you wanted to go.
So, how does it work you ask?
Materials:
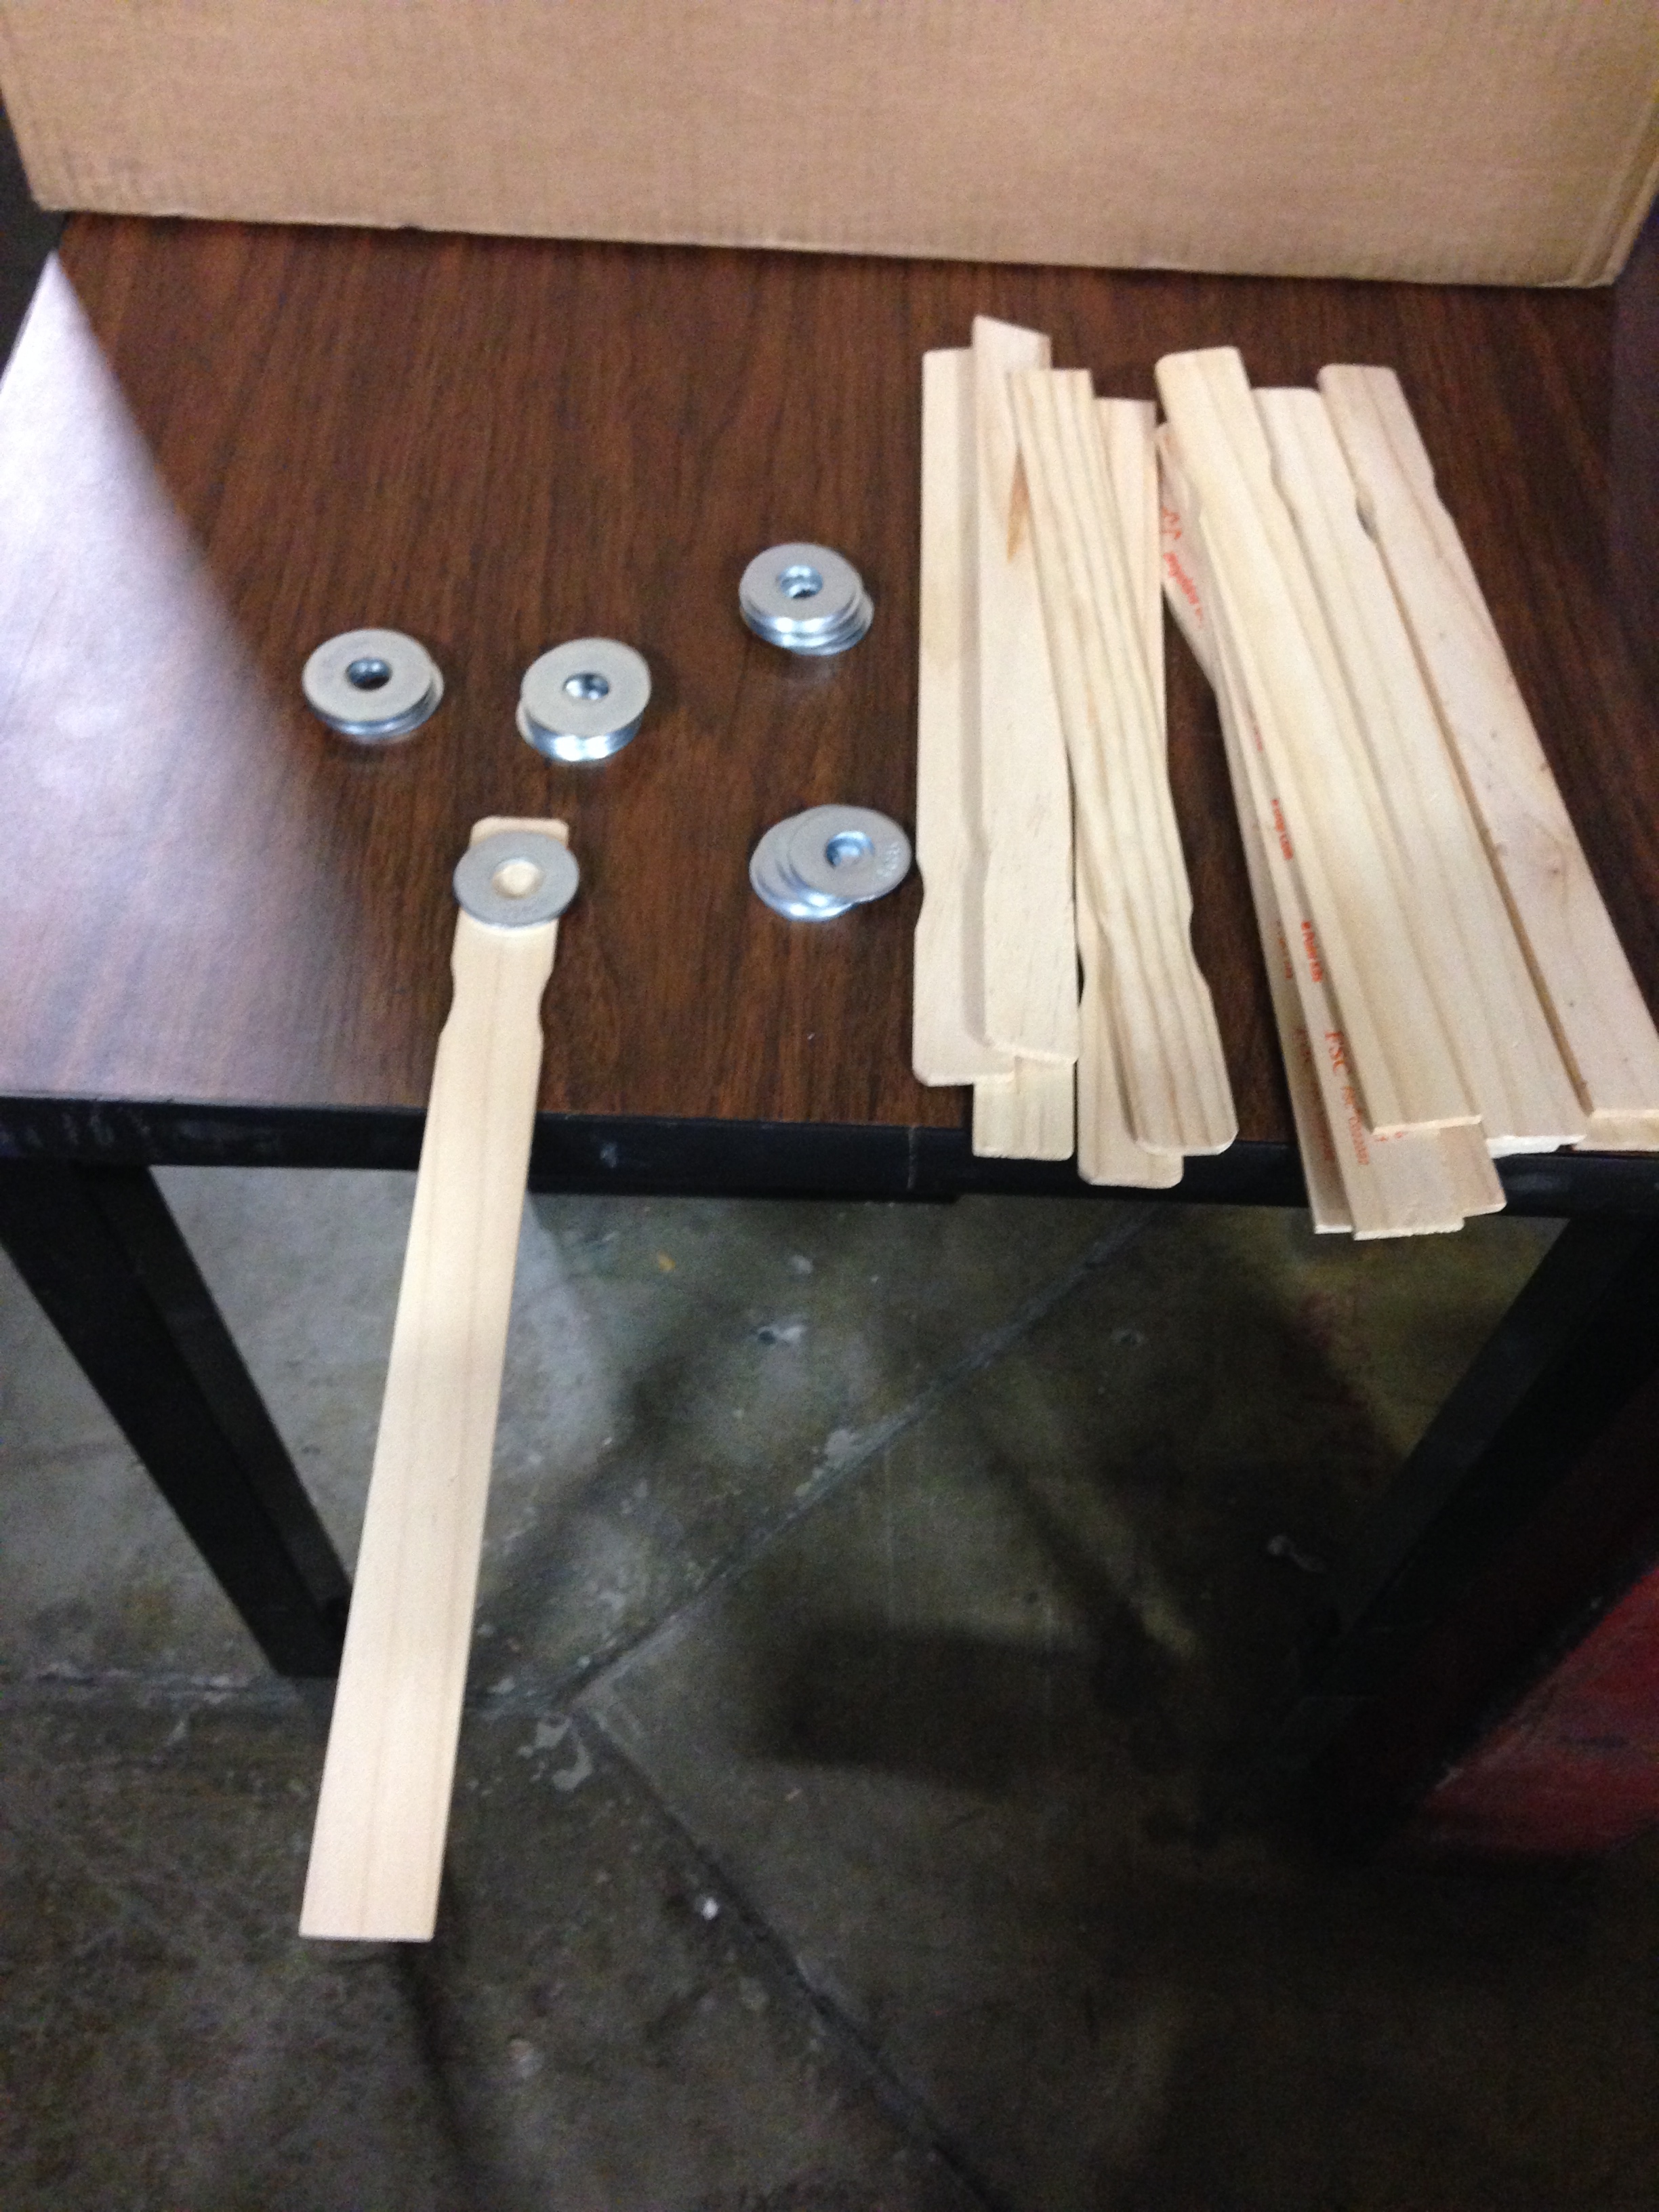
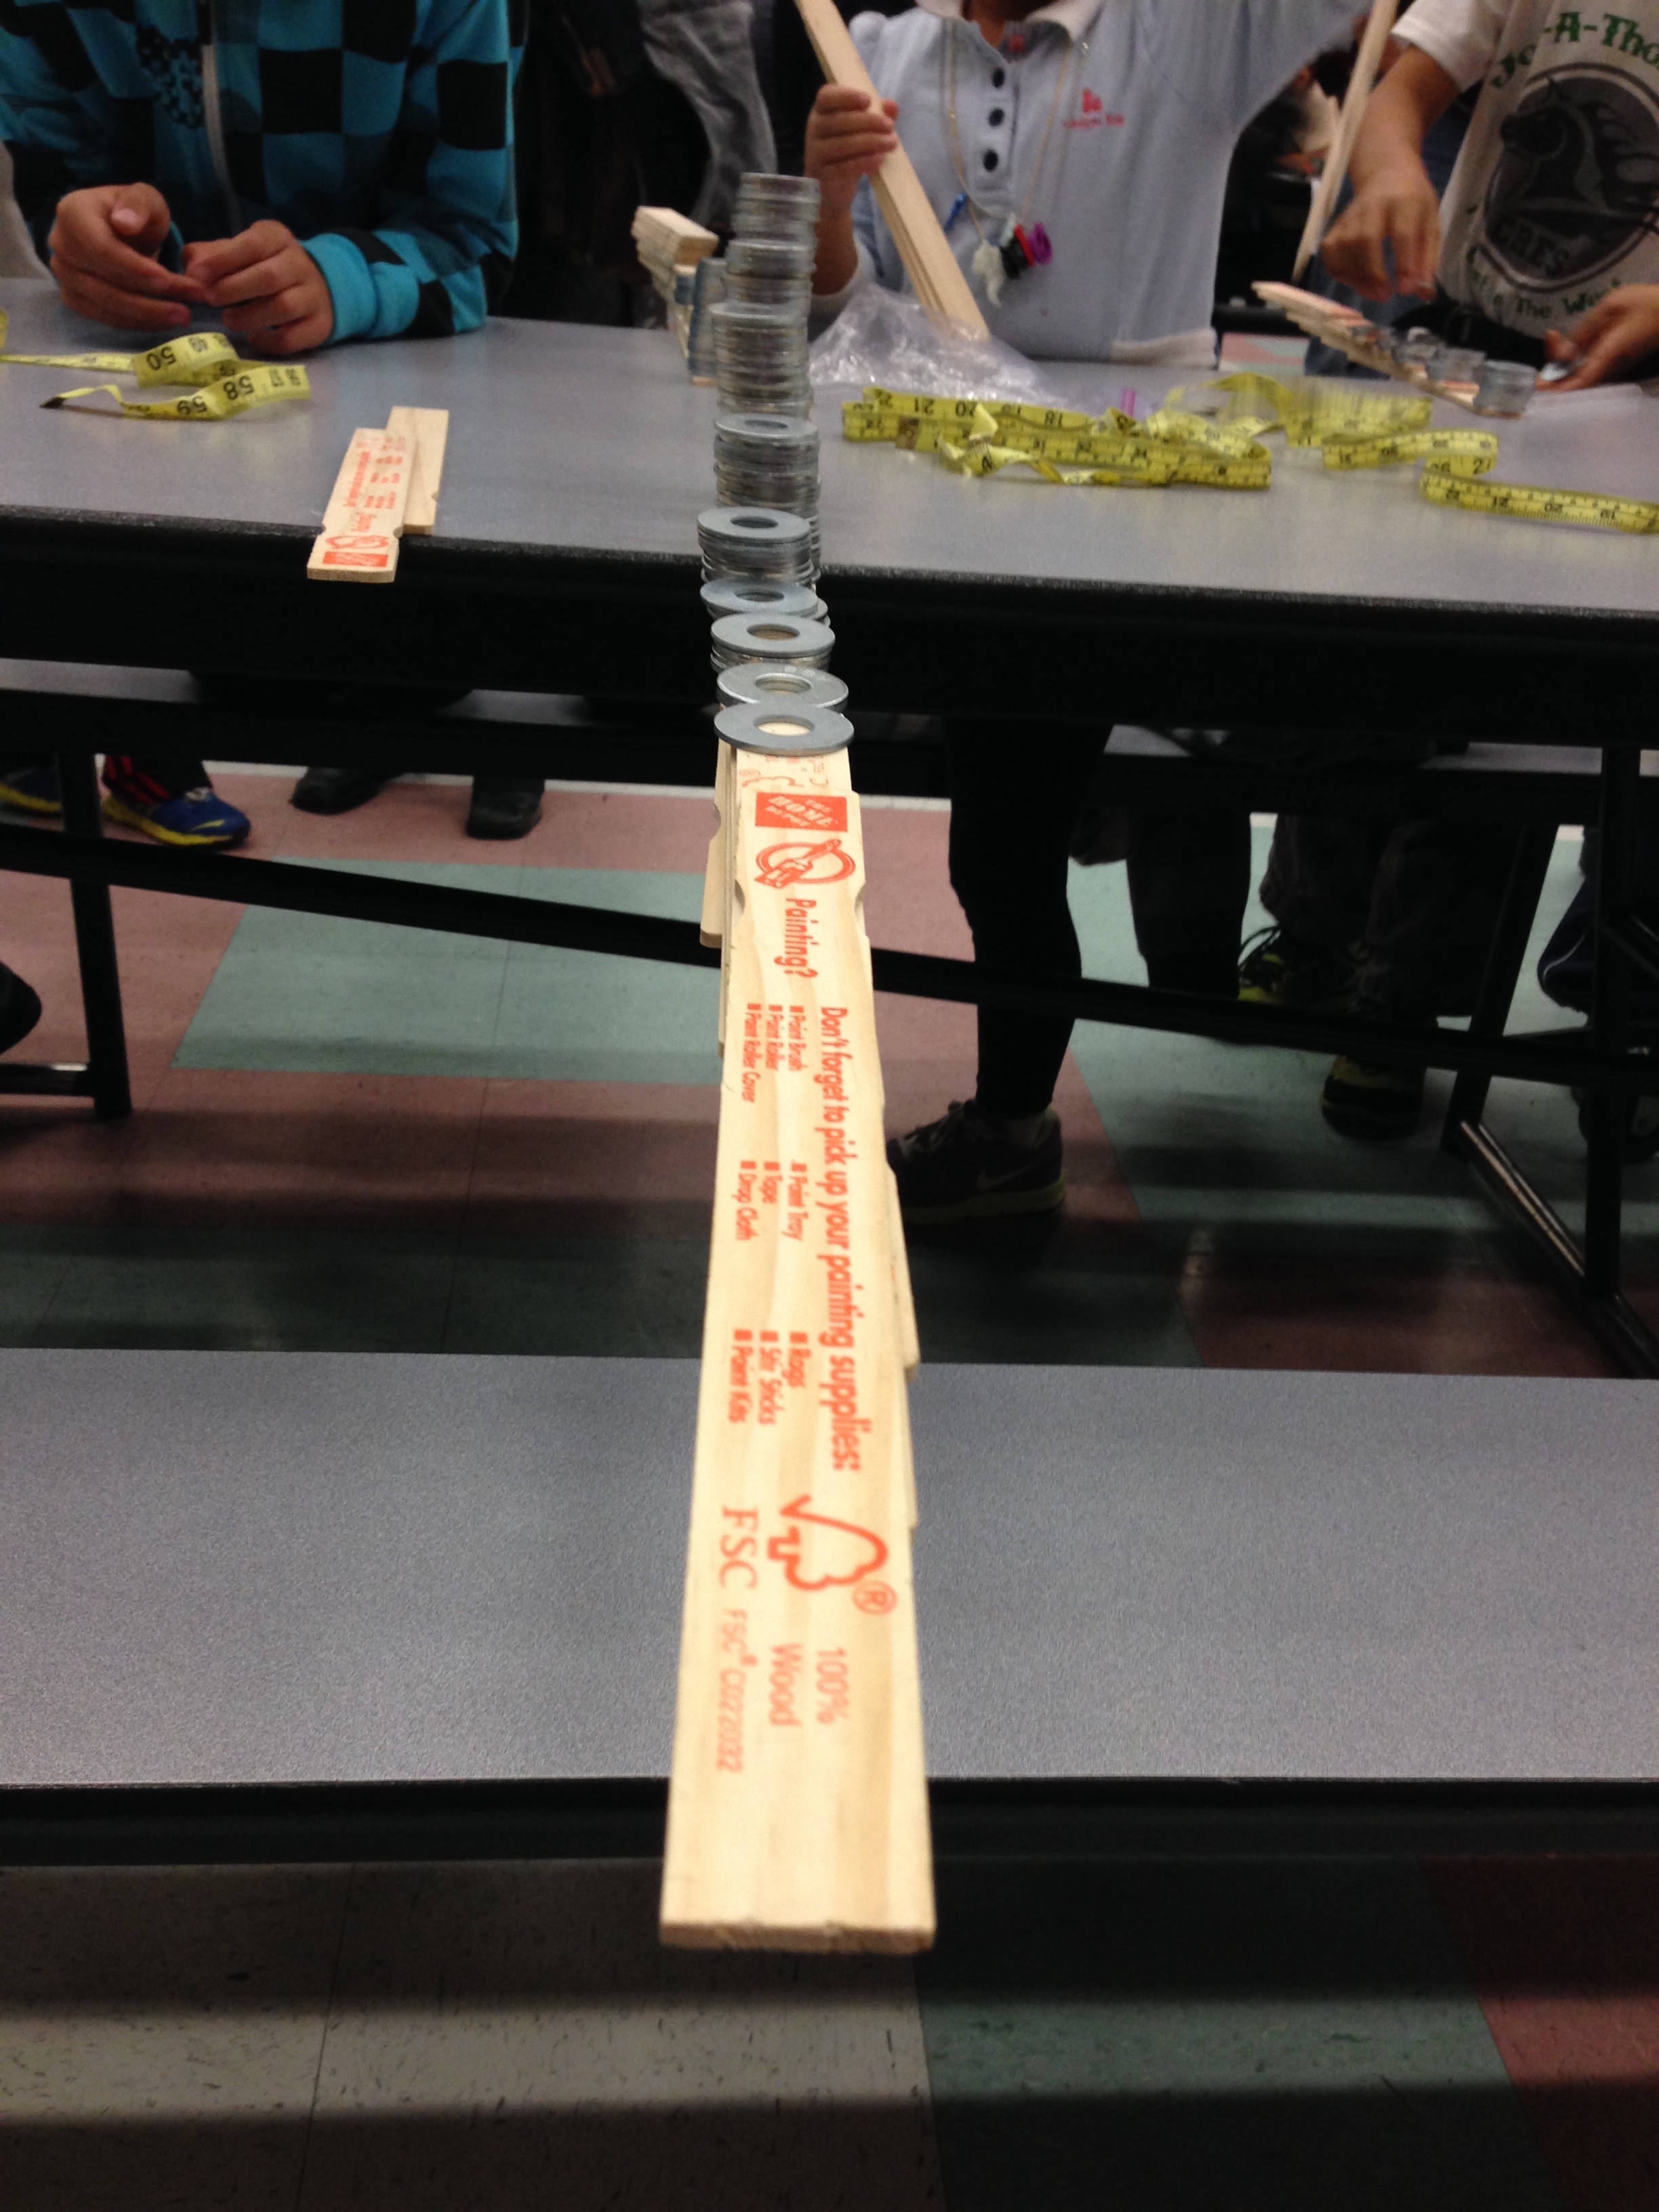
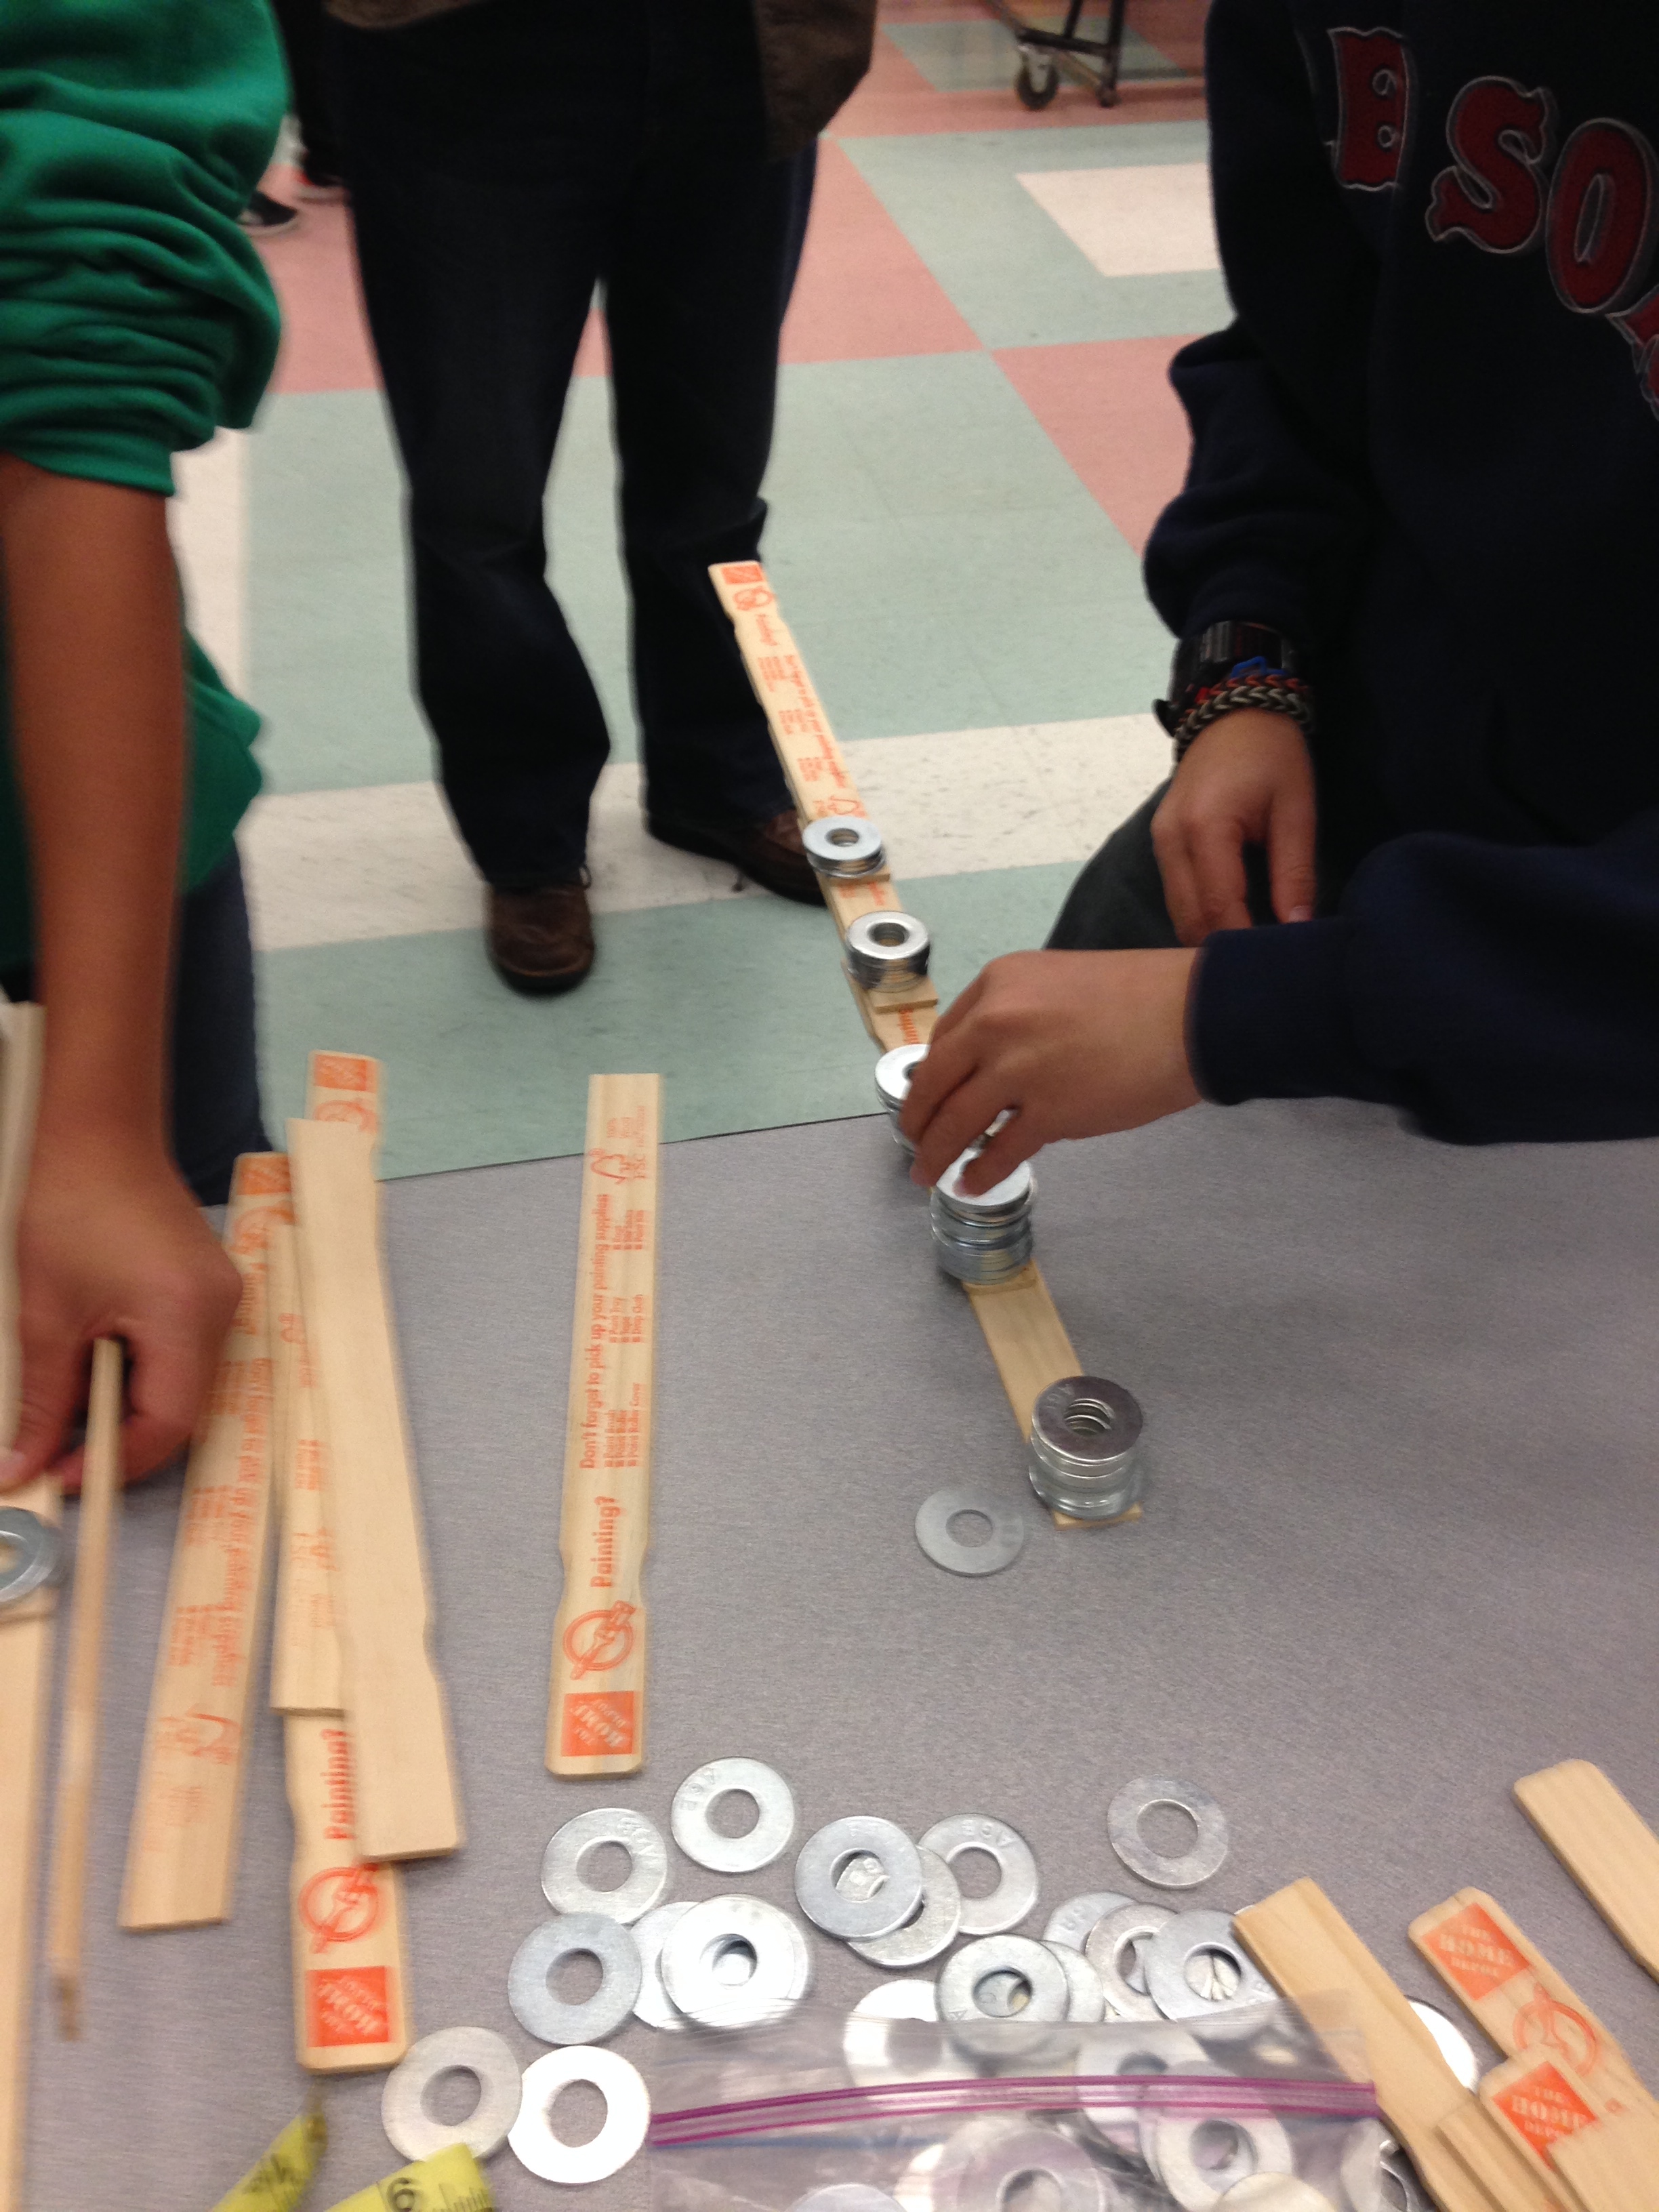
Paint stirring sticks – in this case probably 200+ – we procured these from a big box hardware store … for free when we explained we were using them for science and gave them the obligatory sad, begging face.
Washers – (other weights could be substituted) – these are about “half-dollar size” – we had several hundred.
Thats’s it!
__________________________________________________________
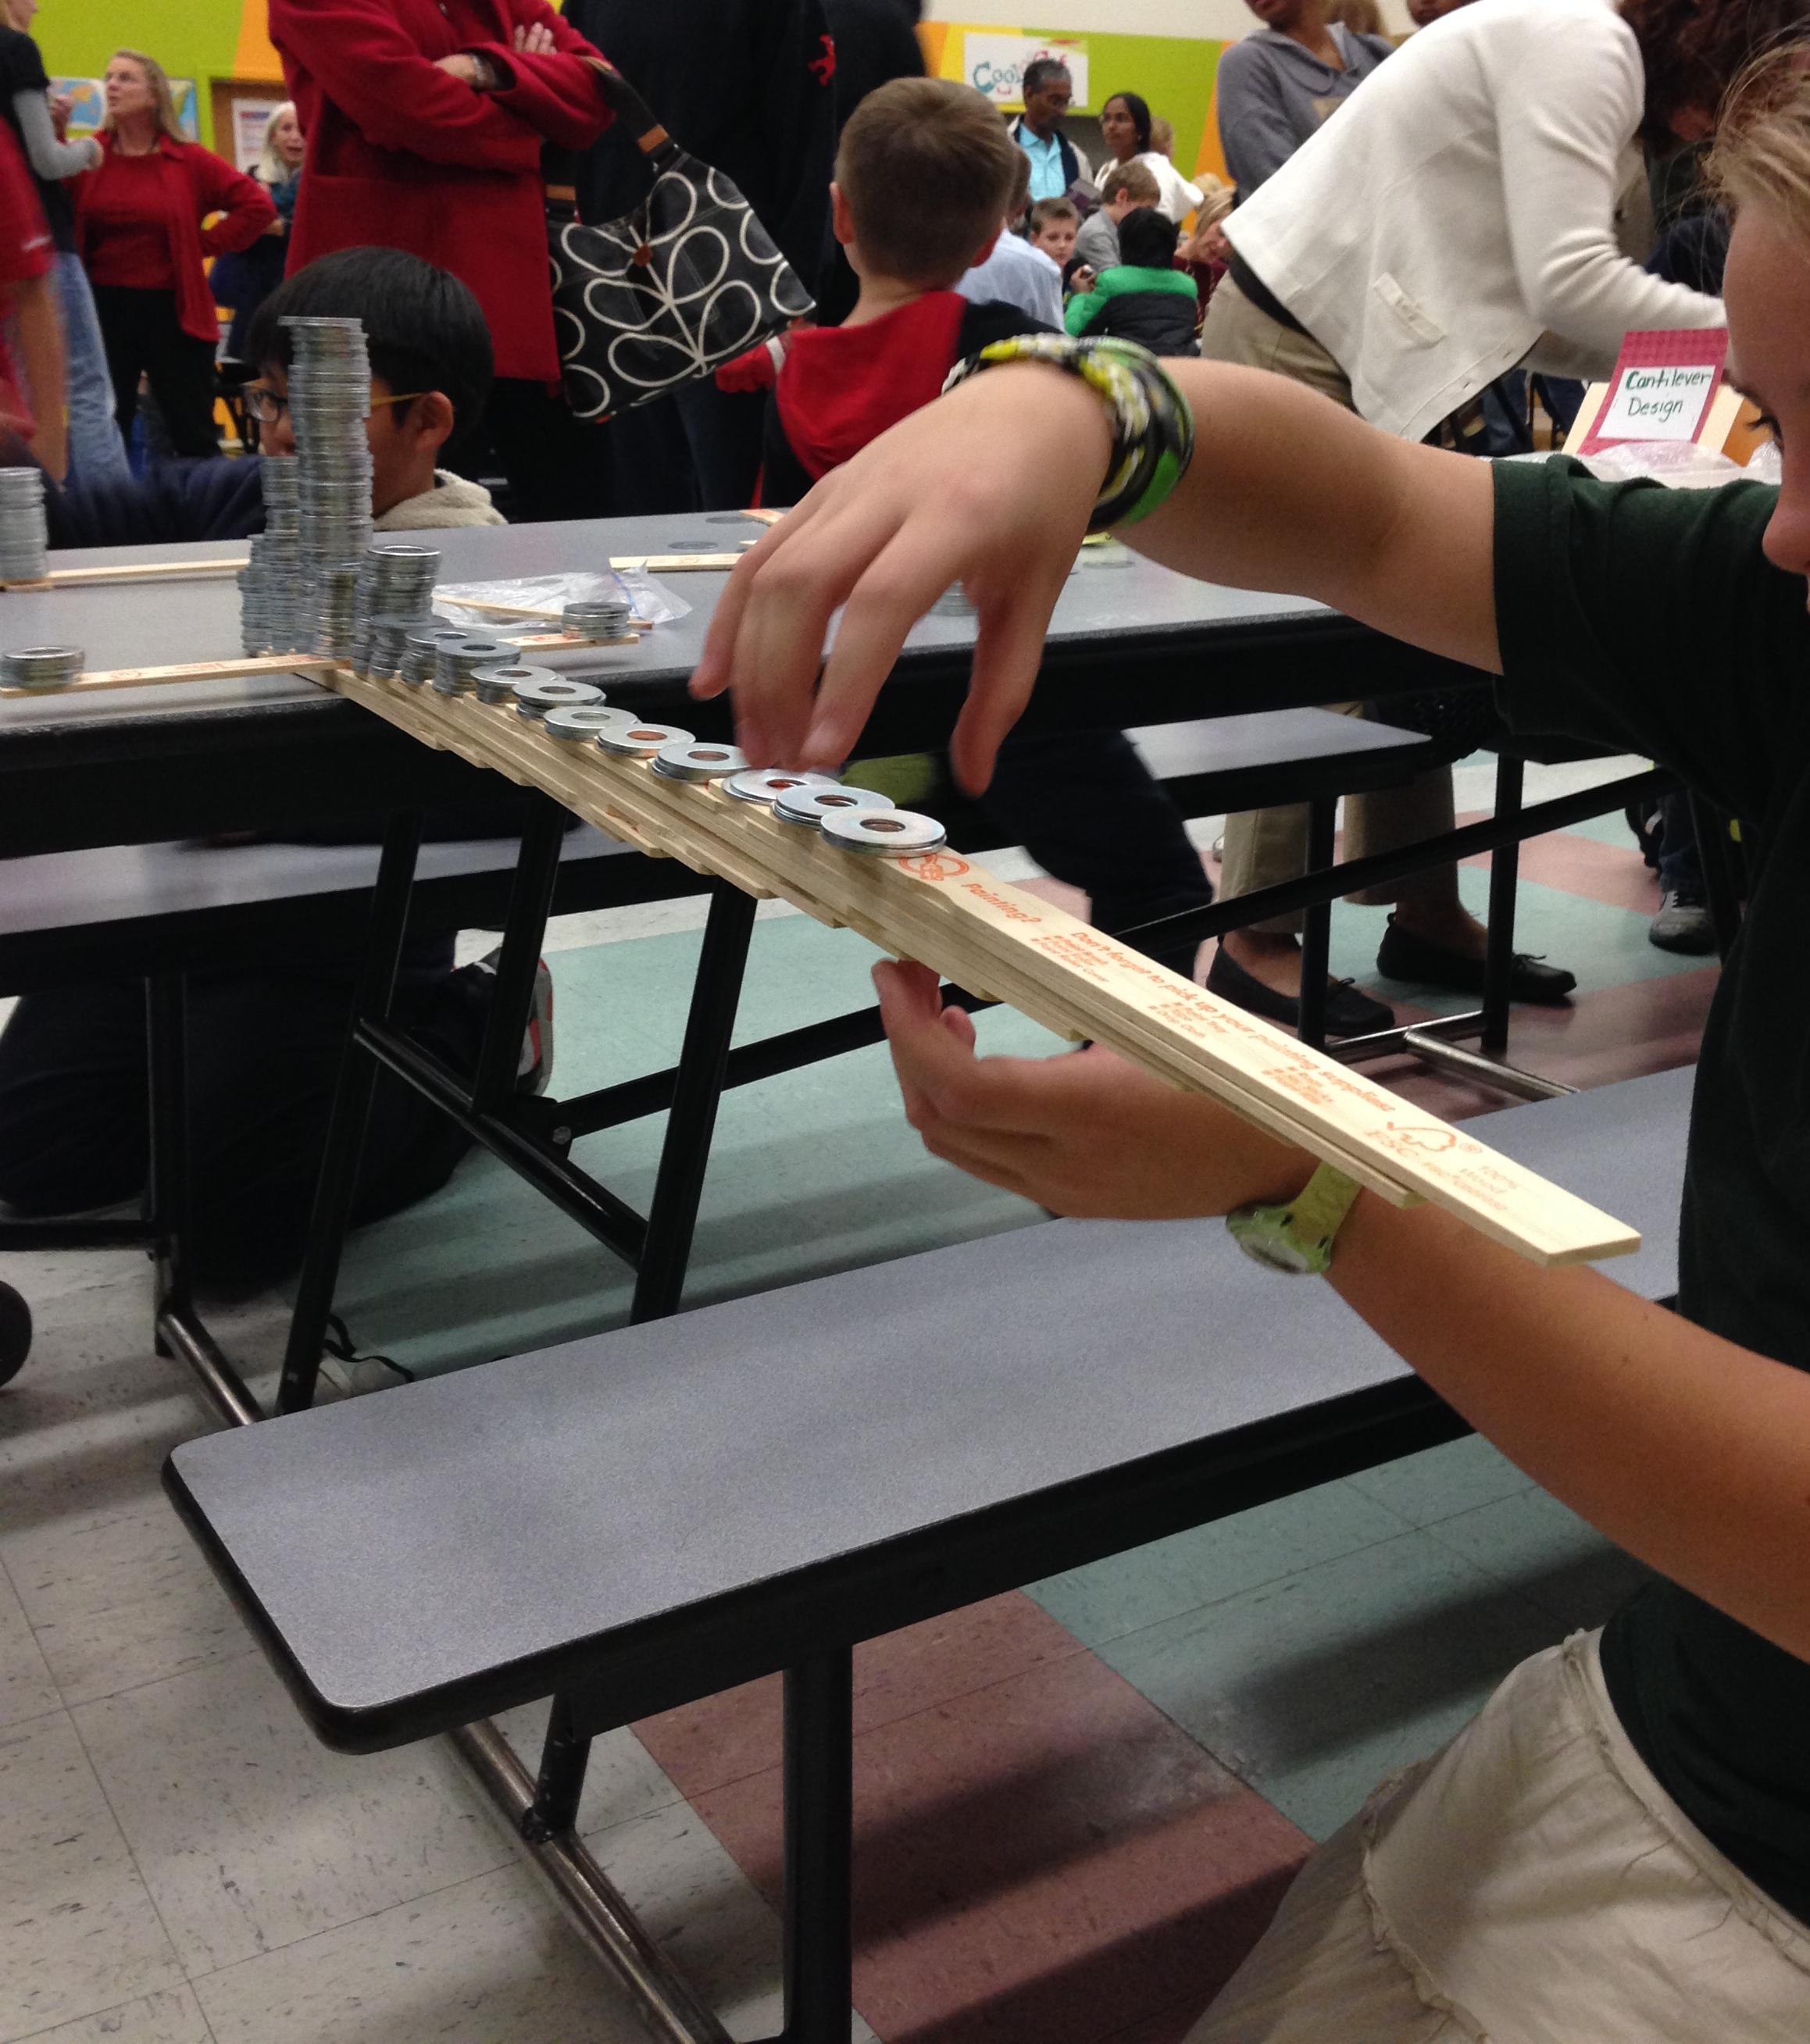
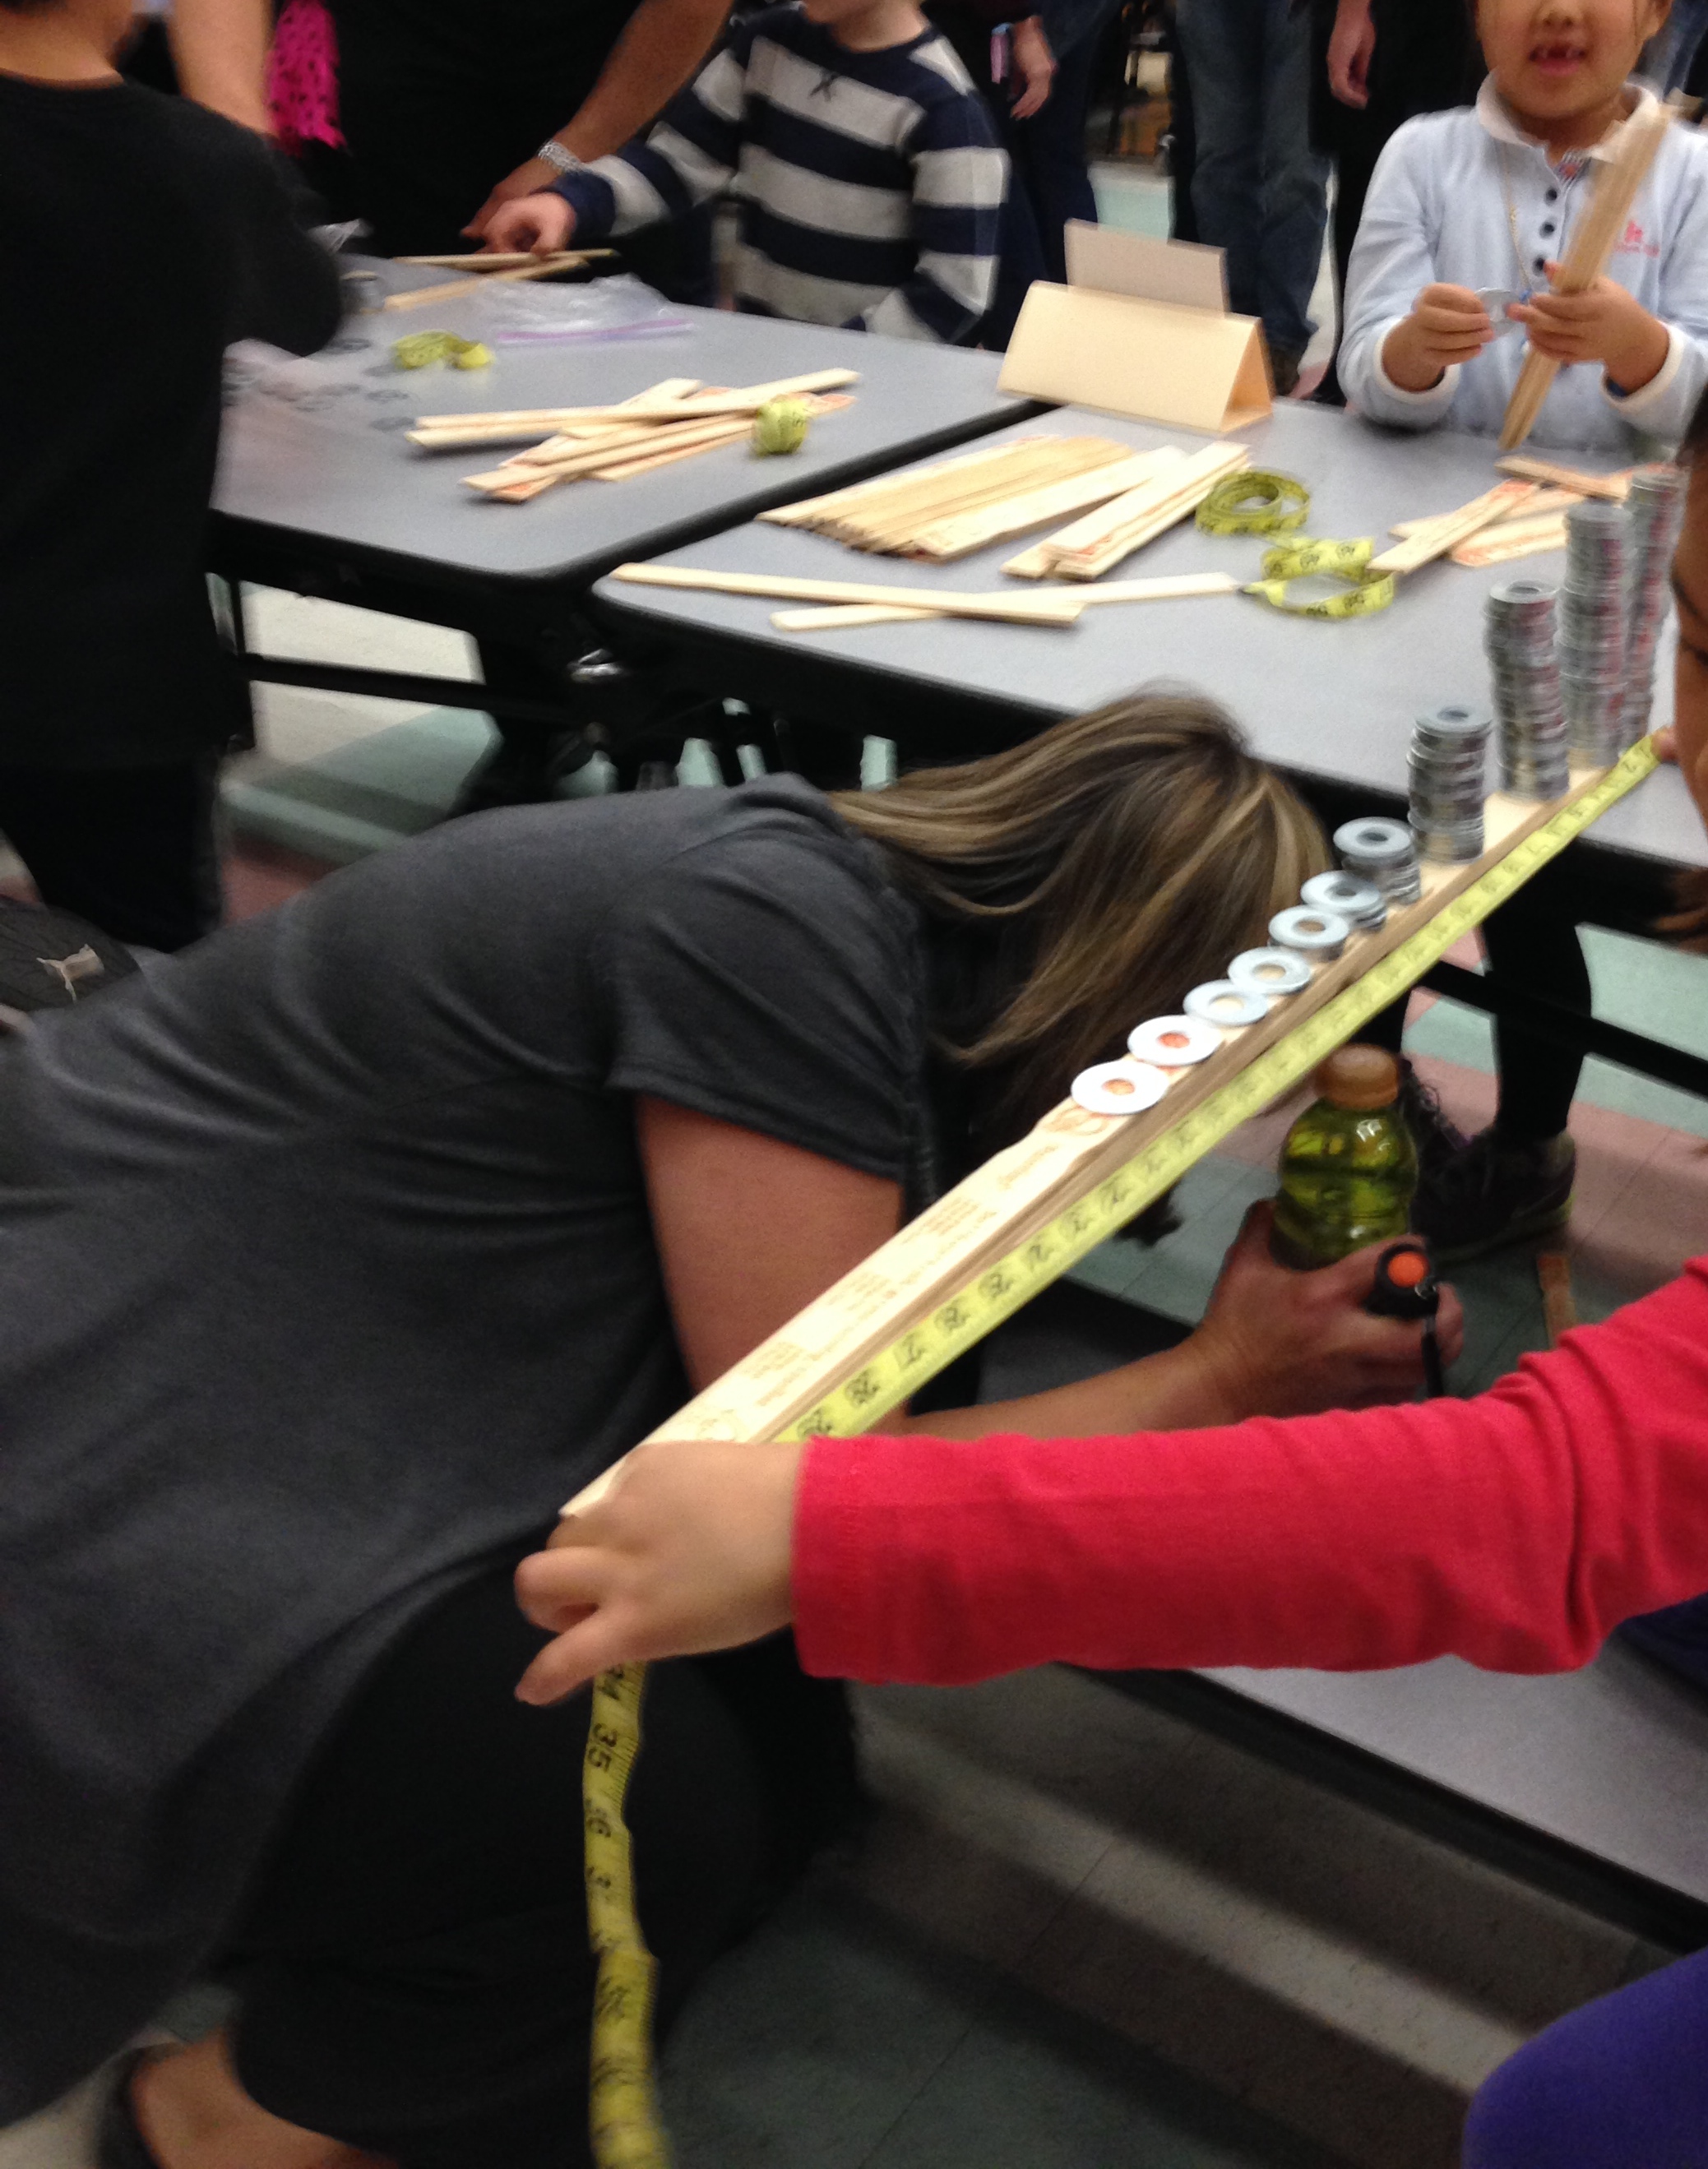
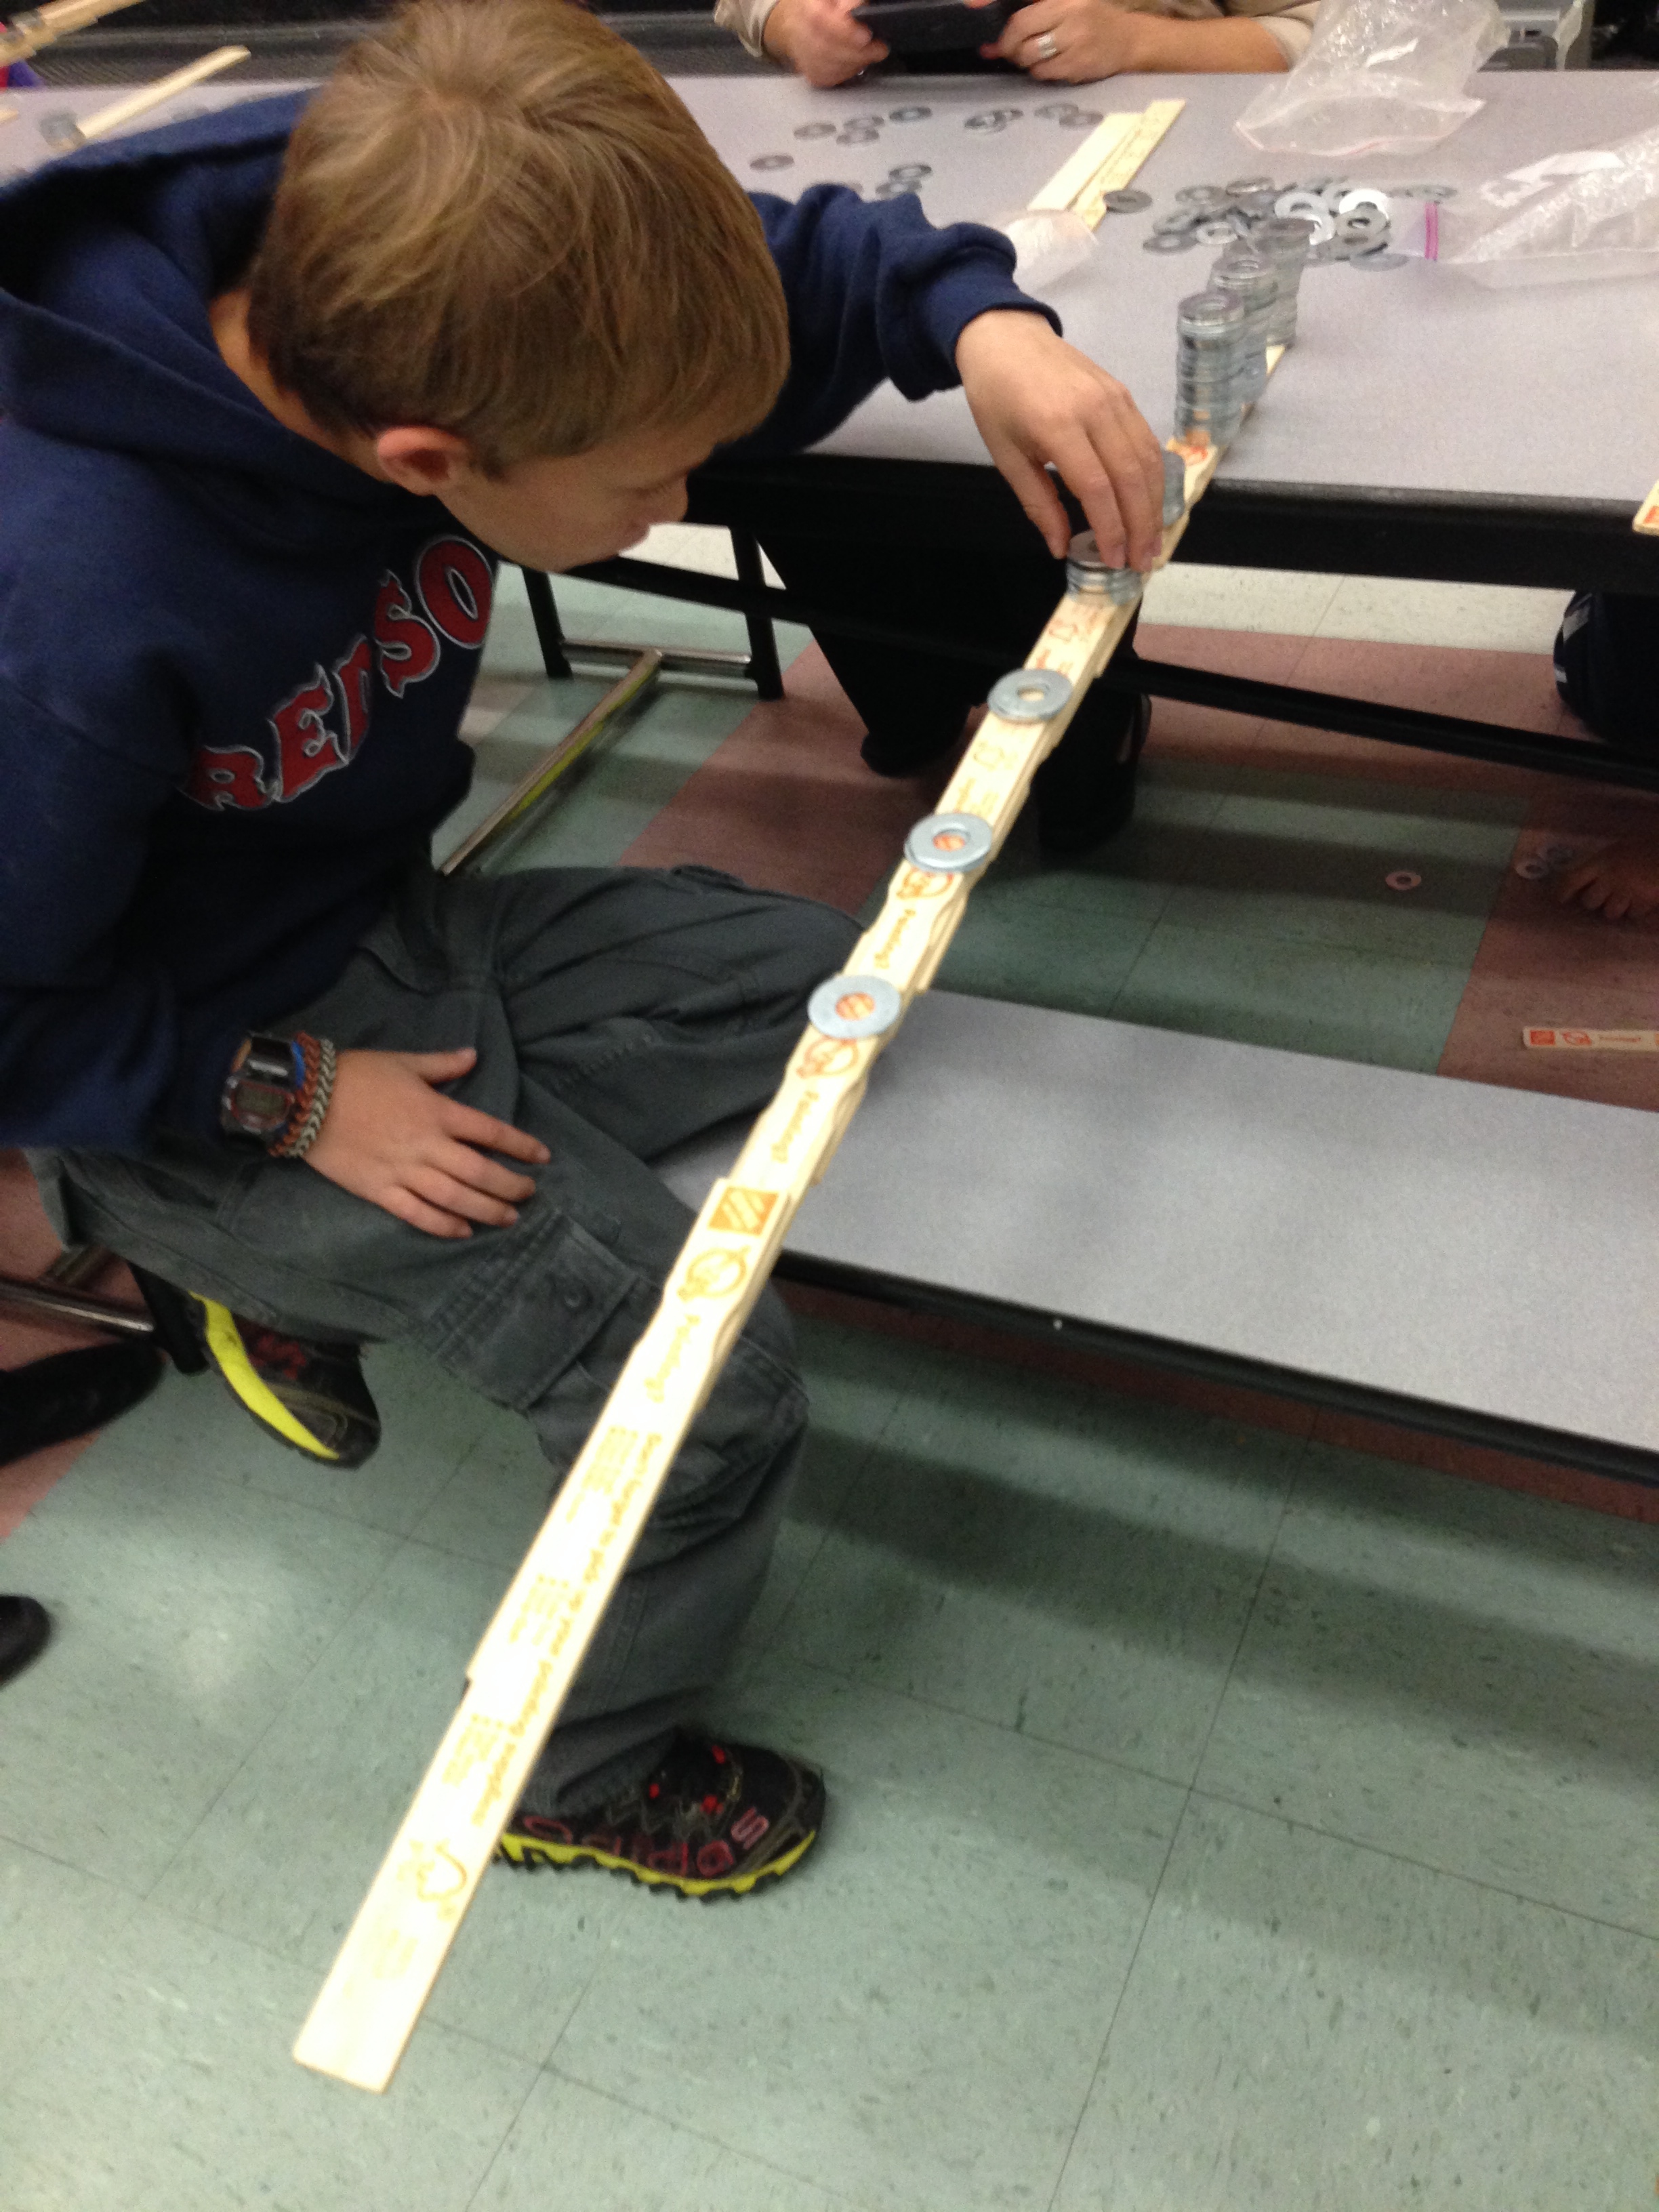
Since this is an inquiry experience, I gave as little input as possible. When getting a participant started (and usually parents stepped back and let their children take it on themselves) I would take one stirrer and place 2 or 3 washers on the end, stick it out from the table (see photo below) and then explain that they were to make as long a span as possible out from the edge of the table. “You can use as many washers and stirrers as you want …. Go!”
No other directions – and questions like, “But what do I do?” were answered by me with shoulder shrugs.
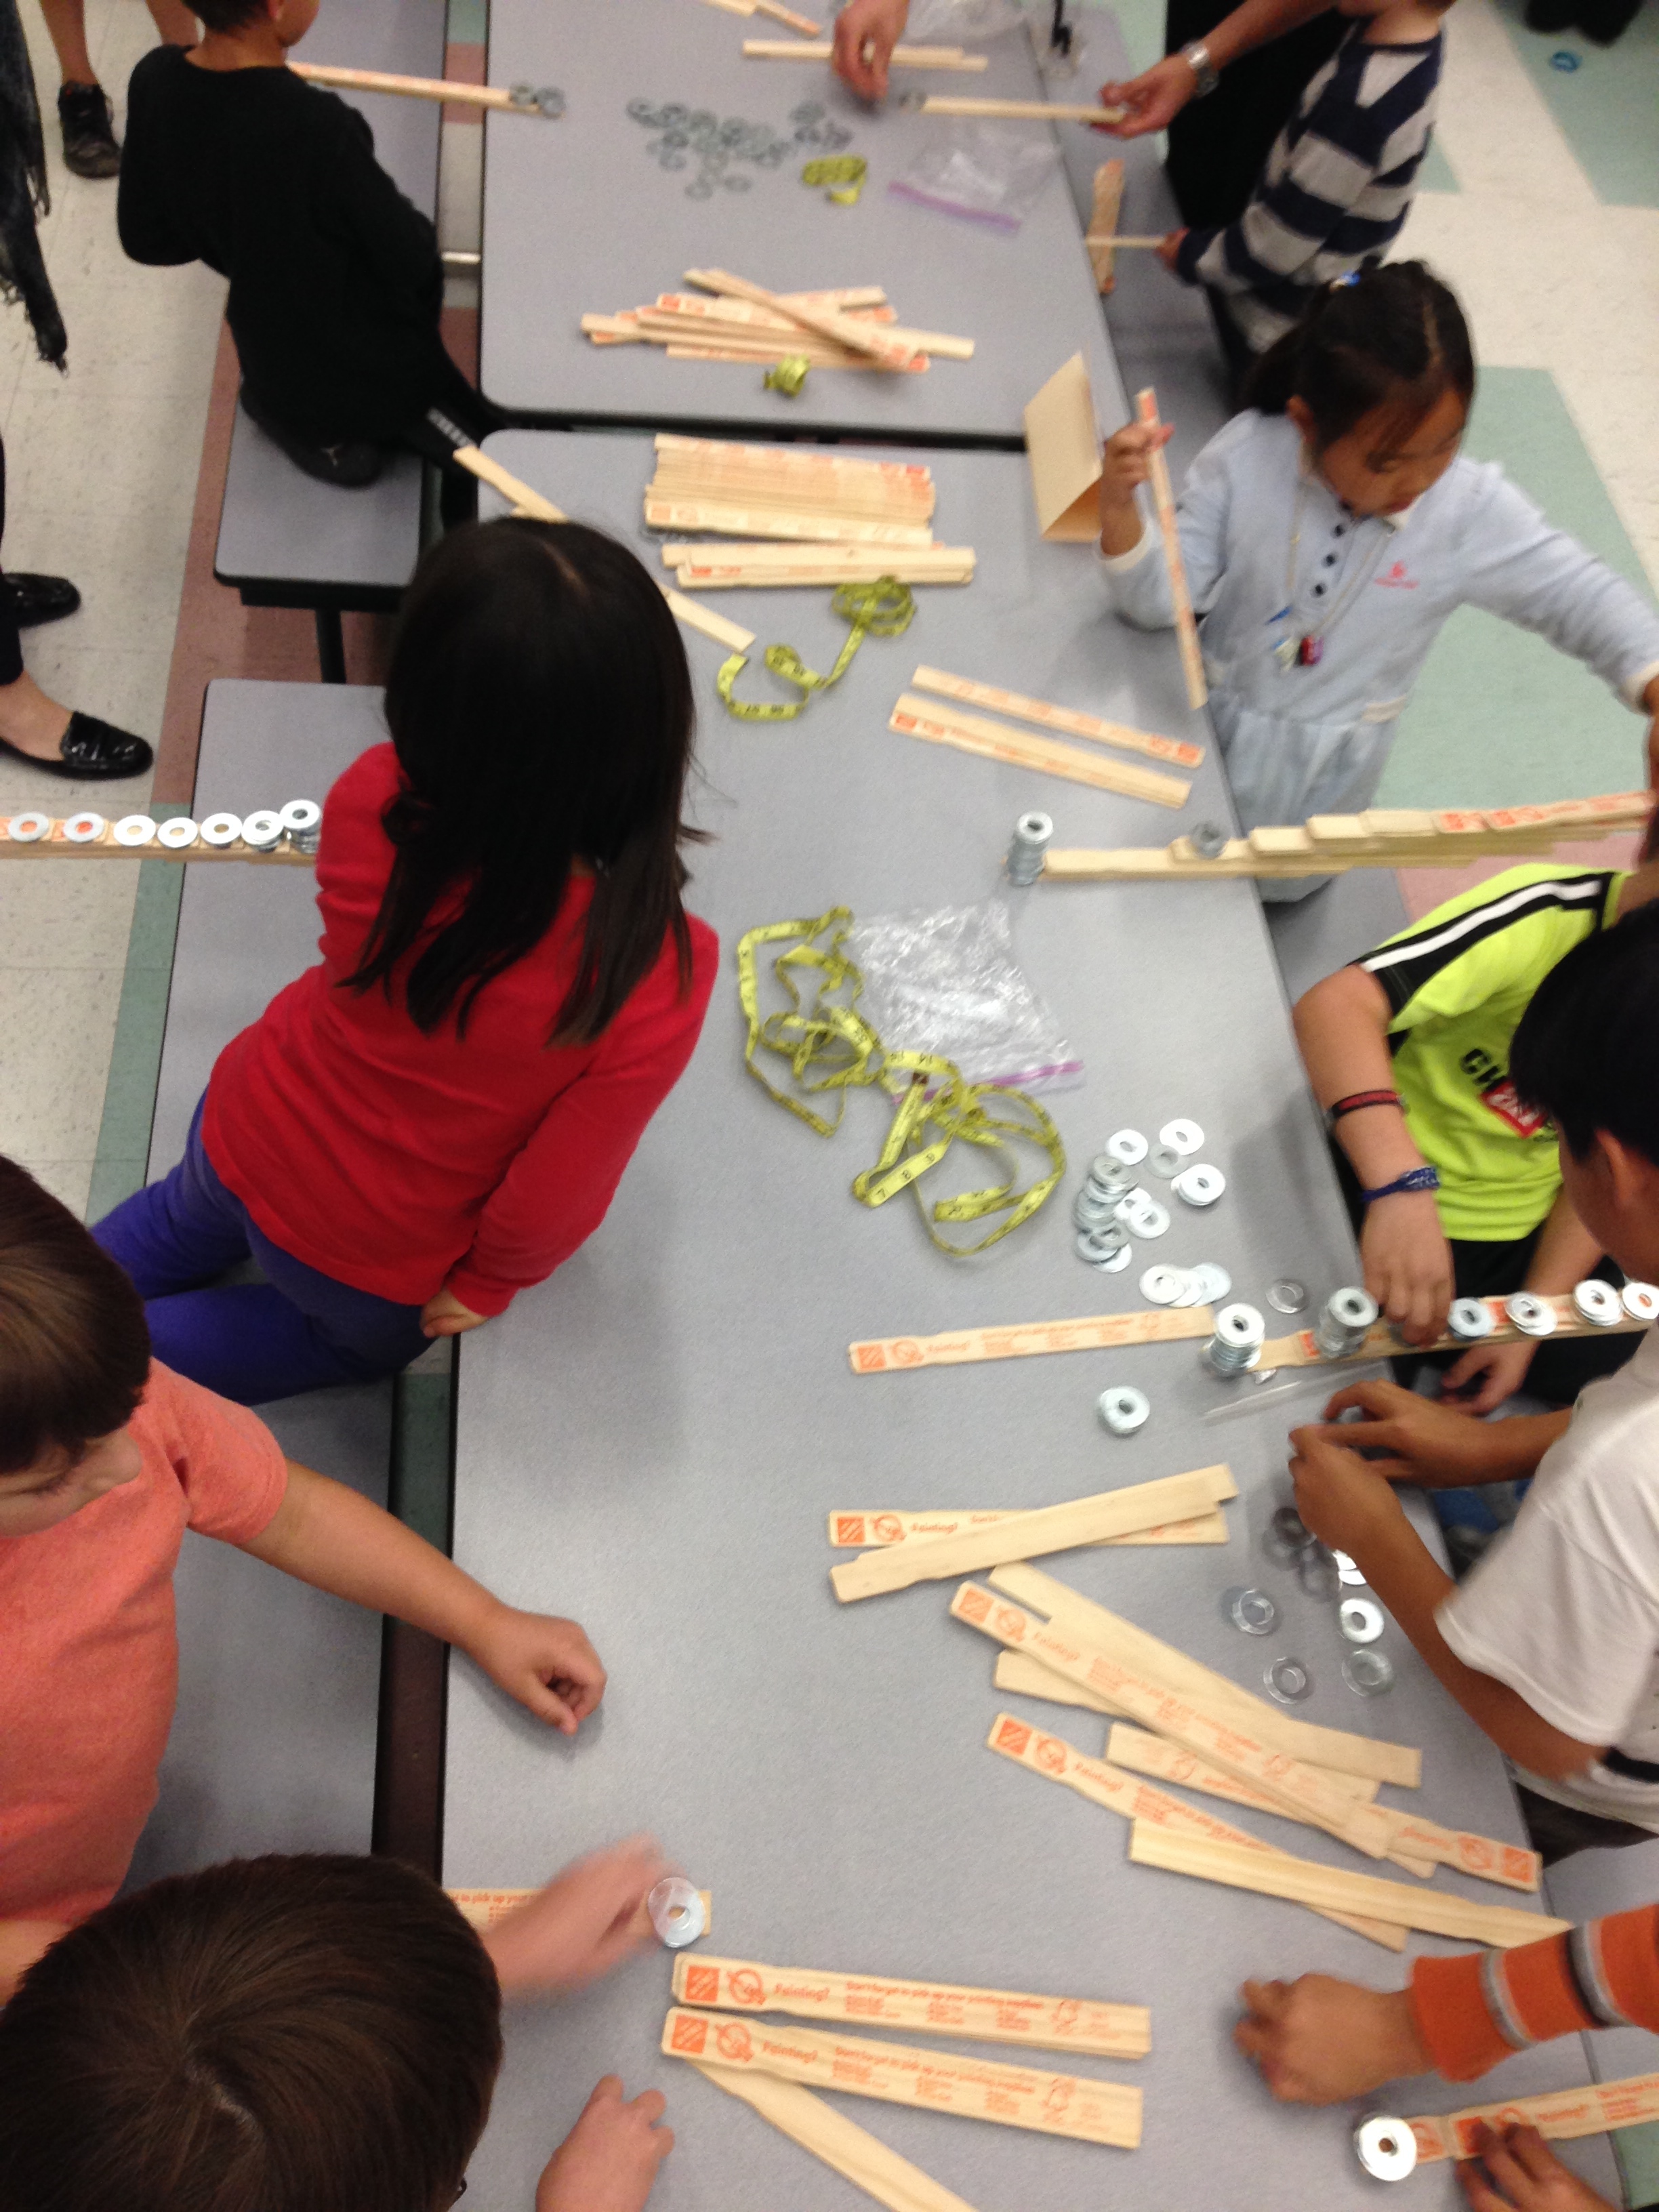
Some students worked by themselves and others grabbed friends and siblings (sometimes parents) and worked in groups. Preschoolers through middle schoolers stopped by, often confused about what the heck was happening here, but we could have charged a fee … if I’d really wanted to be evil (and rich) I would have mentioned that the first ten minutes are free but after that it’s $0.25 per 5 minutes. This event was only an hour long and there was plenty else to see and do … and parents were having to beg their children to leave … “Honey we only have 20 minutes left and this was only the third station we stopped at.” – “Ah Mom.”
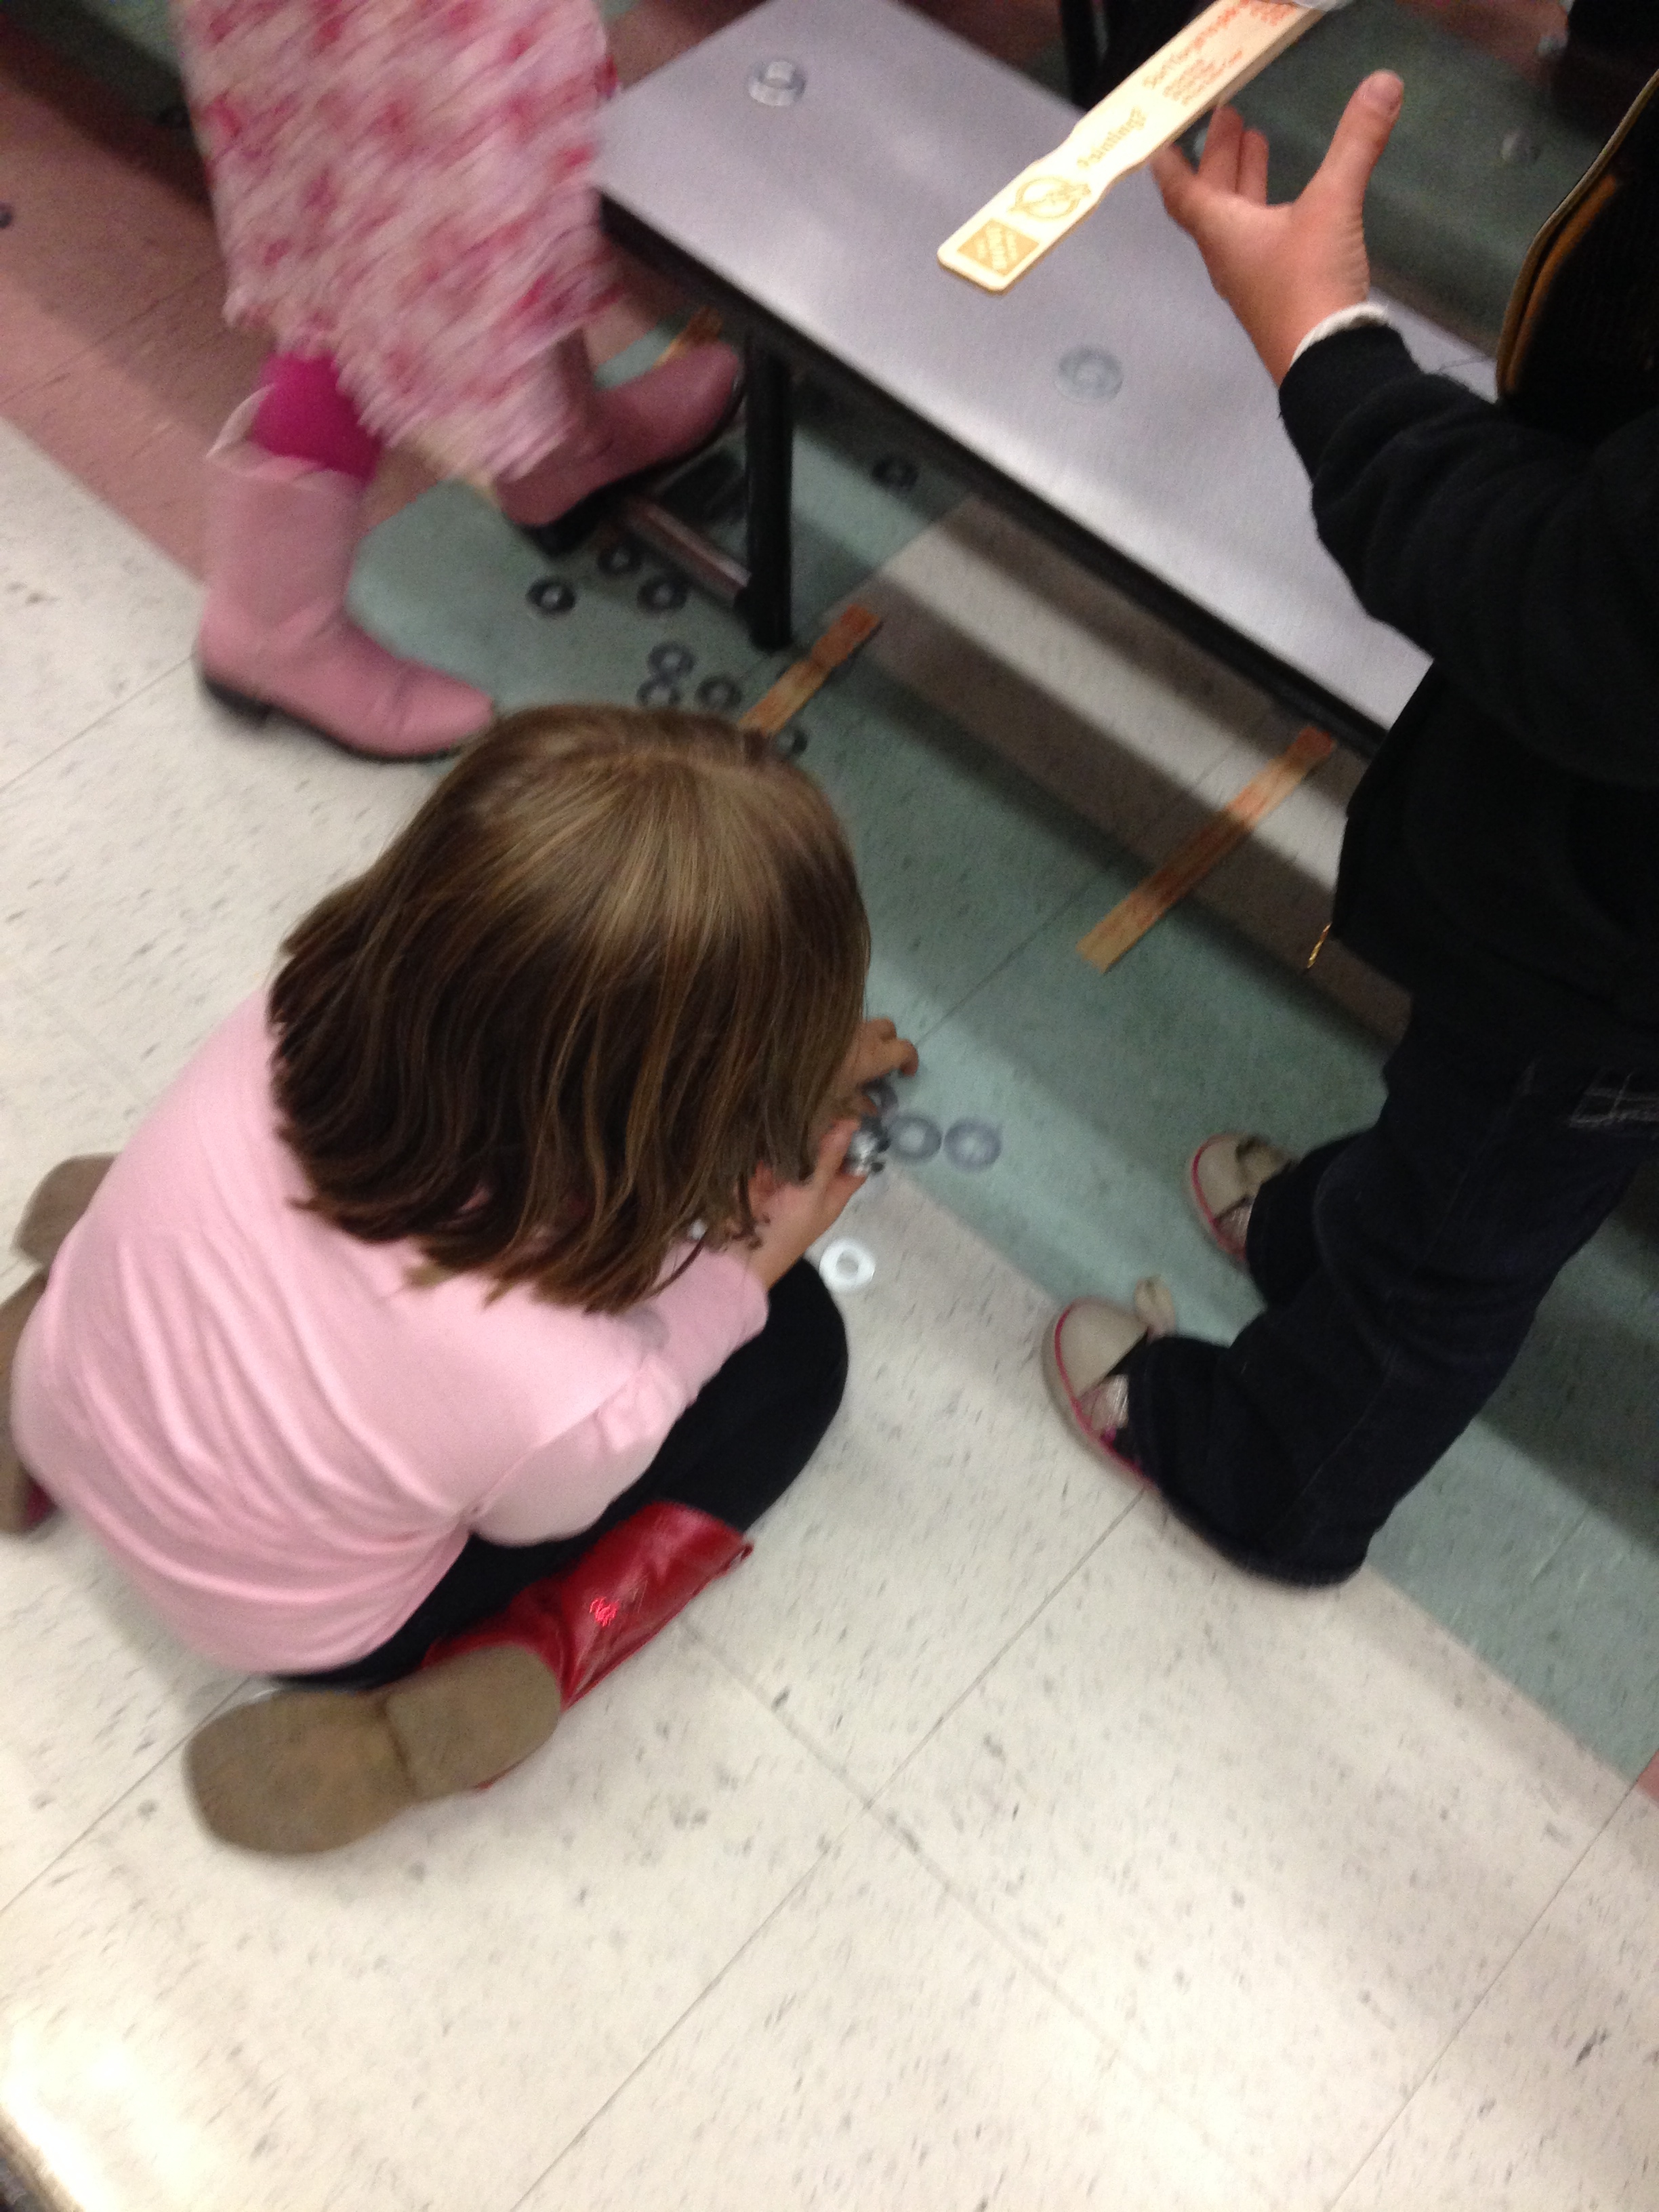
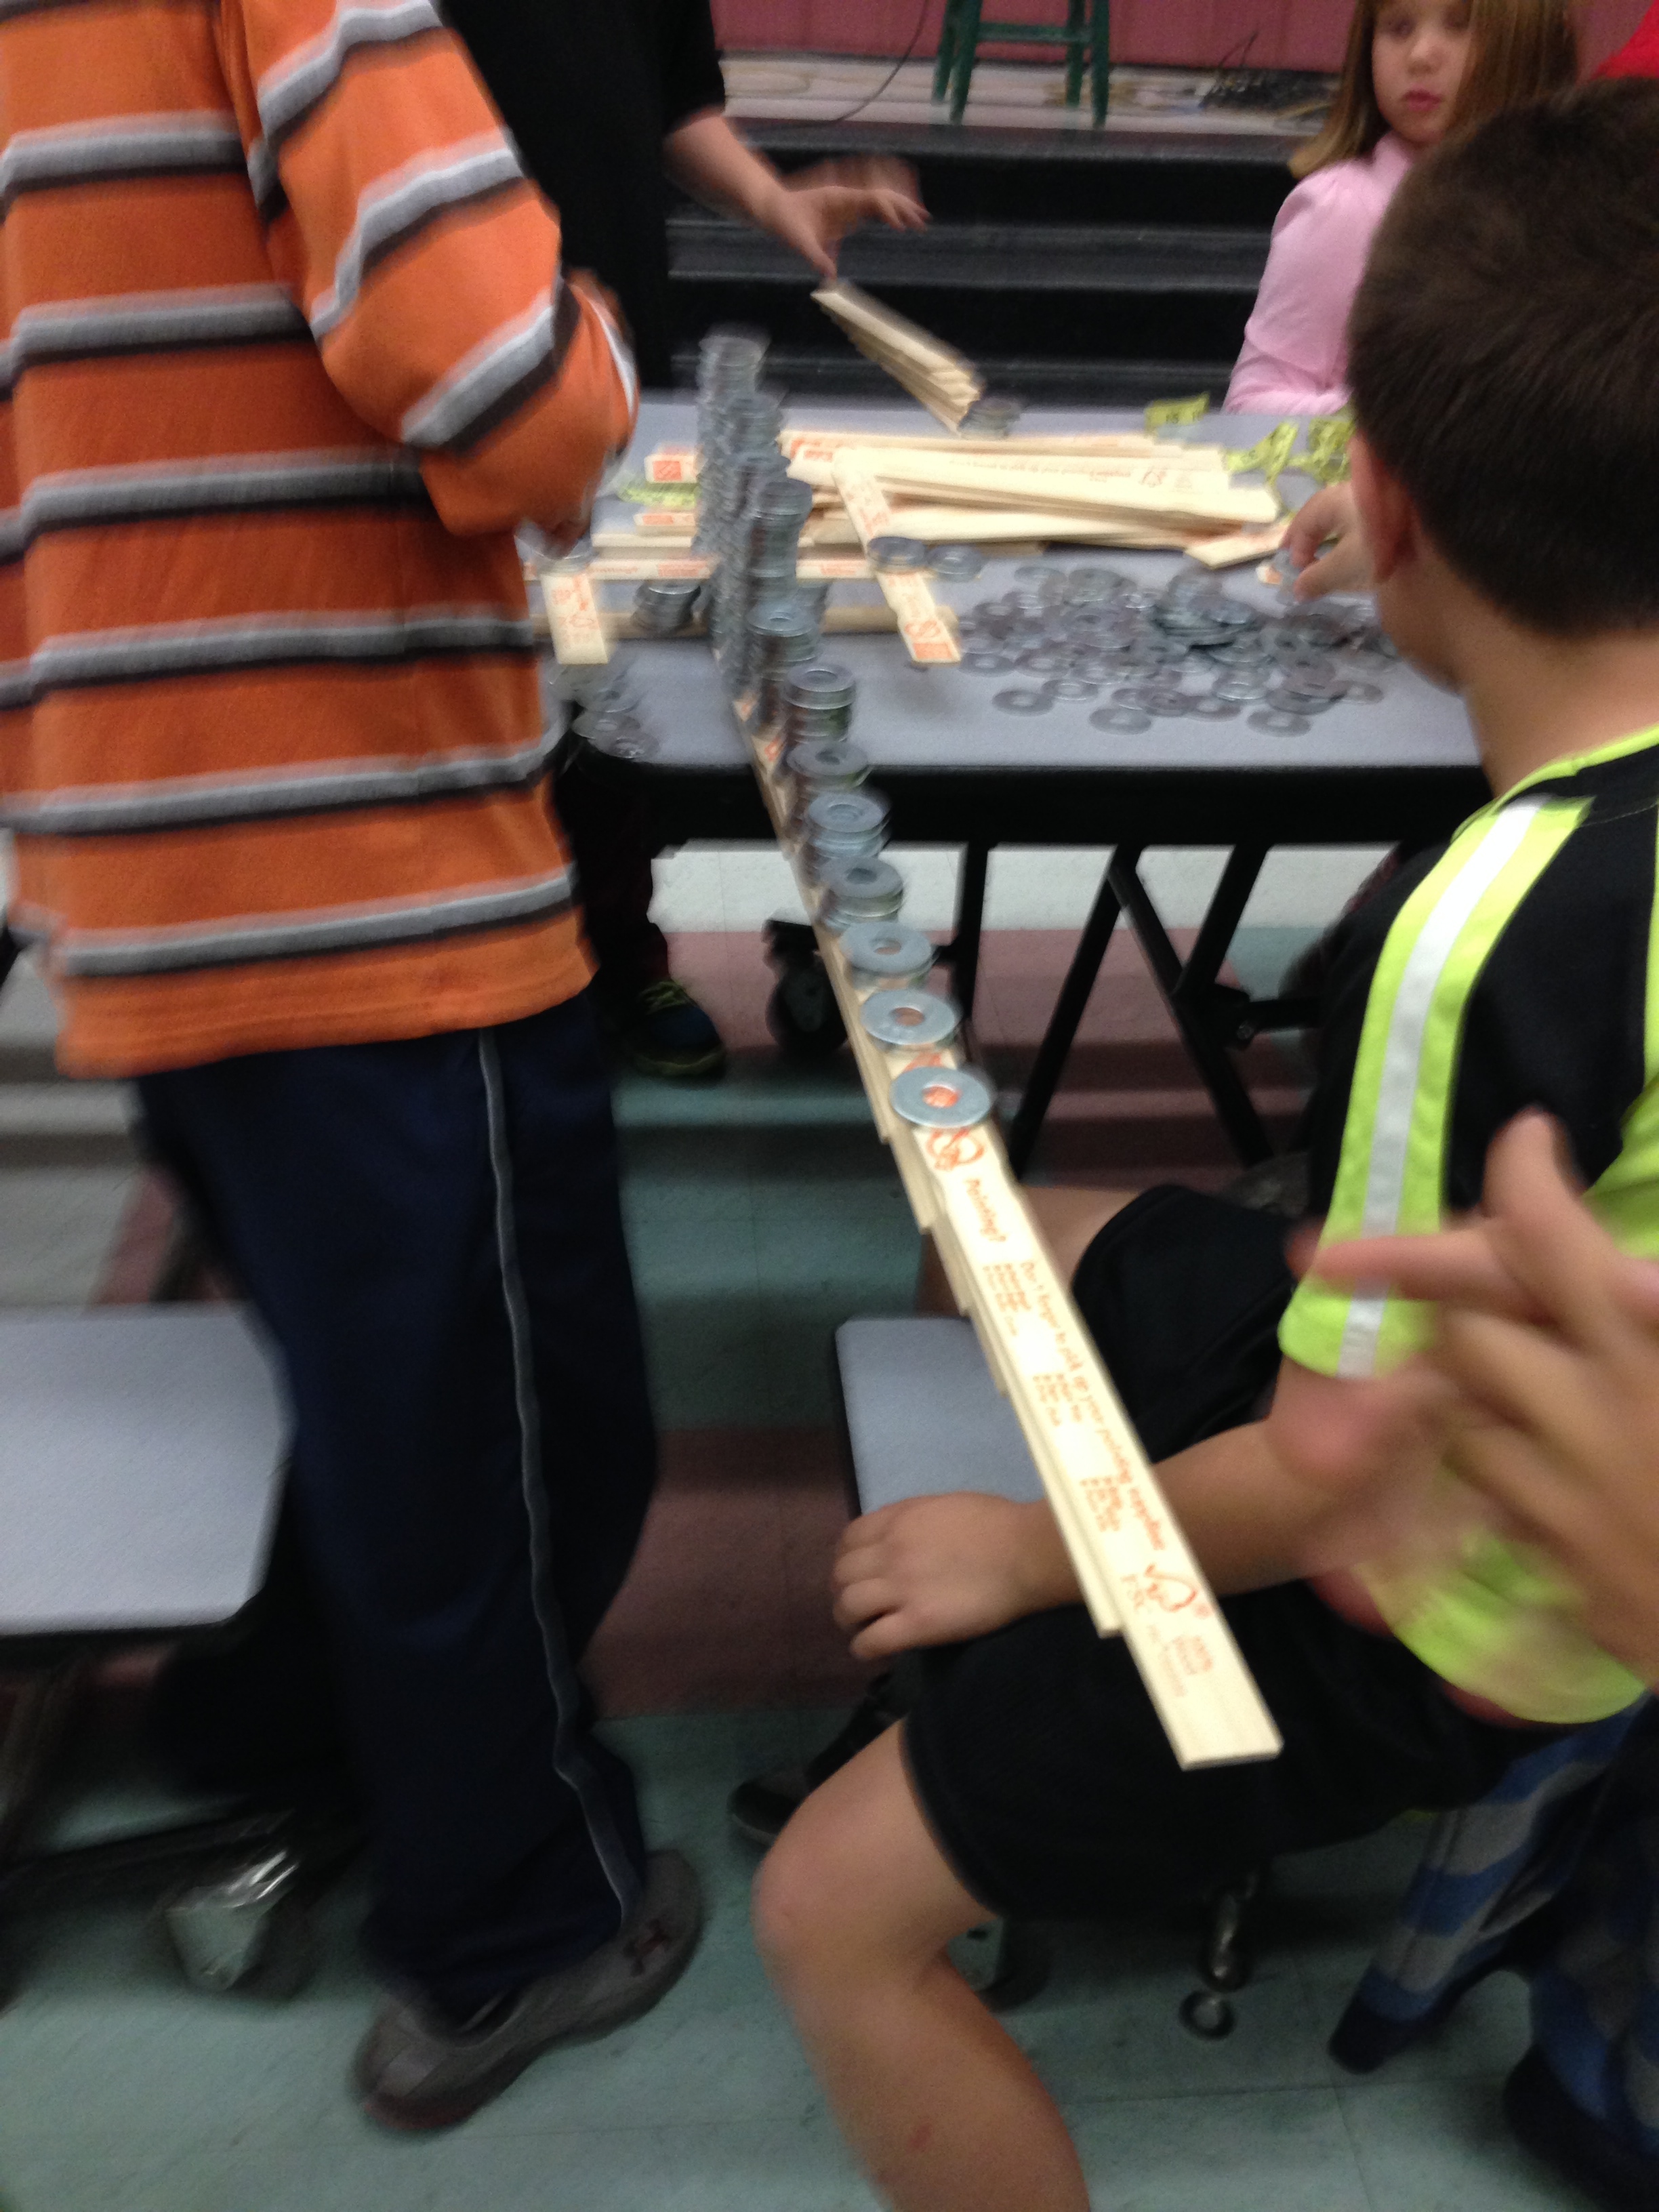
As things proceeded there are failures … which are punctuated by the sound of 20 – 100+ washers crashing to the tiled floor, followed by the realization that the scattered washers and stirrers would have to be picked up. That deterred a few, but generally as fast as they could recover their materials they were back at it.
And when I say they were back at it … check out this video clip of one more intense participant:
We put out measuring tapes – a few measured (and if this had been a classroom learning experience we would have done that for sure), many took photos of their span.
In the classroom I would do just about this same experience as a first step, but:
– Next have students design as long a span as possible with as few washers / stirrers as possible.
– Give materials a cost and have students build the longest most cost effective structure.
– Perhaps have them build a structure that is not necessarily the longest, but with the most stirrers as possible sticking out beyond the edge of the table?
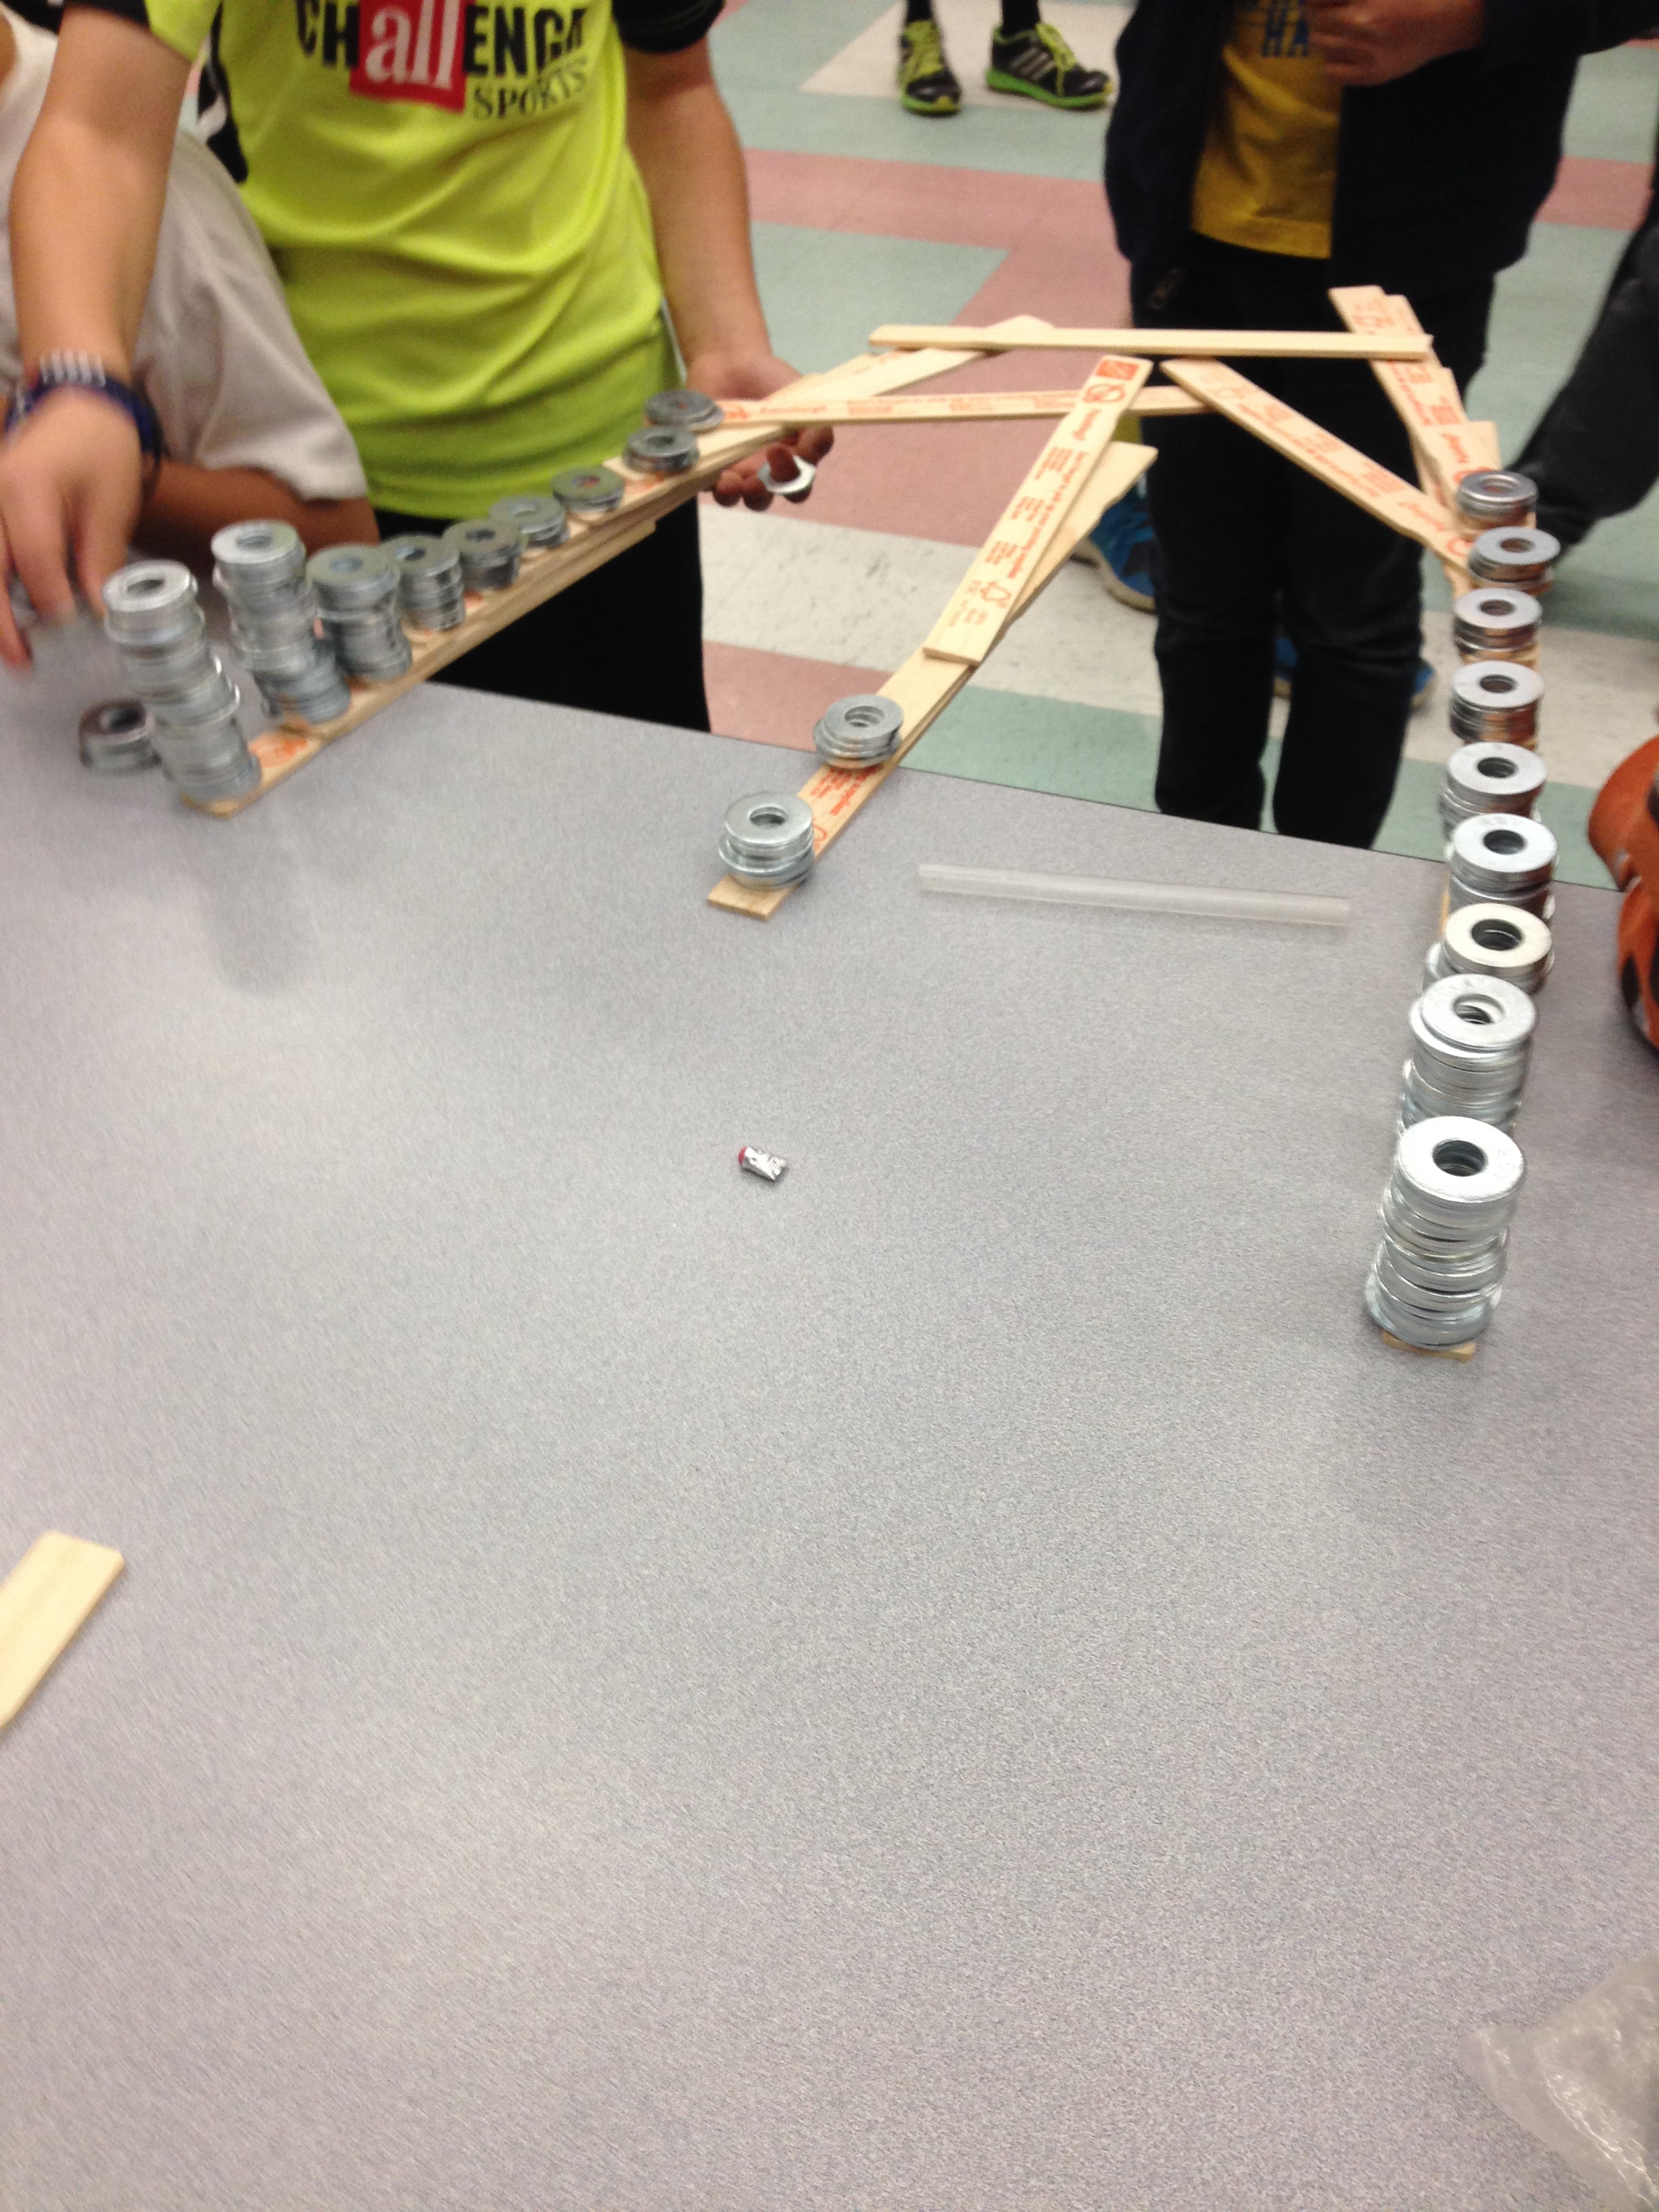
– Can structures be started out on facing tables and meet in the middle to form a bridge between tables? Lots of possibilities.
Two groups that built next to each other decided to connect their structures:
WARNING – OK warning is a bit strong. But keep in mind that these structures are easy to bump into with disastrous results. So think about that when planning where to have students build. Move all the desks to the 4 walls of your room and build out from there? Perhaps the cafeteria? Library? other large room where separation between structures is possible? Also have that discussion with students about looking out for each other.
In the classroom I would also spend some time talking about reacting to disappointment when for any reason their span collapses. Really disappointing for sure, but in the real world this happens (maybe show the Tacoma Narrows Bridge collapse video after your first experience – adults have things end in disaster unexpectedly too) – just know that and carry on.
Writing pieces on what, how and why in a journal would be great. As would thoughts on what will/would we do differently? I haven’t had a chance to develop creative writing ideas yet, but descriptive words about what it looks like, feels like, … colors, etc. can always be turned into poetry and stories.
More photos from the experience:
Here’s a link to a Flickr set of photos.
UPDATE: If you played the video above note how tenuous the balance is. Note that the weight on the table has to be more than the weight hanging off the table. How much weight on the table is necessary to offset the weight off the table? Going deep might include pre- weighing the stirrers and washers and then getting as close to equal weight on both sides of the edge of the table. Think of the edge of the table as the equal sign in an equation, but this is going to be an inequality because there has to be more weight on than off the table. How close can you get to equal? Is there an inequality that shows that correlation?
Learning is messy!
I am aspiring to be an elementary school teacher. I like how this project included not only the students but their family and friends. I like the idea of family being involved in the learning process. This looks to be a fun group activity to do with students. I hope to come up with more fun ideas before I become a teacher so my students will enjoy learning. Did the students you did this science activity with enjoy it?
Hi Kelsey – Yes the students thoroughly enjoyed it.
Learning IS messy! I had the privilege of participating in a STEM function through volunteering with our company. The excitement of the kids was contagious! They are so curious and ready to explore to so they can to learn. What a great program to show kids that learning about science and technology can be fun!
Hi, I’m Chea Driver, and I’m a graduate school student at the University of South Alabama. As part of an assignment, I was asked to find a blog that I would like to follow, and I chose YOURS! It was listed as on of the Top 20 by Scholastic.com. Congratulations!
Your “STEM: Cantilevers Span” post is so motivating for so many reasons. I hardly know where to begin! As a teacher and having taught at 2 different schools in 2 different states, we never had a Family Science Night! How shameful! What a great way to get students and parents inspired to learn! This is definitely an idea I will initiate when I return to the classroom. (I’m a stay at home mom, for now.)
I think it’s wonderful that you thought of and addressed the impact that disappointment might have on students by pointing out the failure of the Tacoma Narrows Bridge. Interesting video! I also liked that you found ways to incorporate this lesson into all curricular areas. This is definitely an example of what learning should look like! The only problem I can see would be finding a stopping point.
I think a great addition to this lesson would be to invite a guest speaker, possibly a civil engineer. Who knows? One of your students may decide to become a civil engineer someday! Wouldn’t that be great?
Mr. Cosby, I am really inspired from this science project. I love the fact that you were very creative with this project and you made the project fun. From the photos you shared, the students seem to be having fun, but most importantly they are learning. I hope to one day be a creative as you are and make learning fun for my students. I hope to use this project when I become a teacher. Thank you so much for sharing this.
Hey:
I was researching cantilever activities for my class when I cam acroos your site. Lou’s name caught my eye. I have participated in two Nevada Gemm summer programs that he helped facilitate. I just wanted to extend my gratitude as it seems his mentorship continues to influence my classroom.
I am in my 5th year of teaching and have moved from Montana to Nevada and miss the opportunities to grow that I found with Gemms: thanks for giving me great direction in my early years!
I was wondering if you could send me an evening outline of your family science nite? I would love to initiate something similar in my new school? Does Lou/you or any other STEM participant know of another mentoring program that I could access in Eastern Montana/Northern Wyoming?
Thanks,
Stacy Hansen
I don’t even remember how I found this blog post but I am so grateful that I did! I went to a huge box store and got 1,000 of the paint stirrer sticks donated. I am going to have my second graders write a thank you note to them. I also used this activity at my school’s Family STEM Night last week. Everyone loved it, especially the second graders who were the experts and able to show their older siblings strategies when they were working together!