Nevada STEM Underwater and Aerial Vehicle Computer Science Institute

I shared on Twitter not long ago, “The good news is I got a grant! The bad news is I got a grant!” There is too much truth in that dichotomy, but in spite of all the extra work and rules and policies and bids and other “red tape” to be dealt with to purchase the supplies and organize the classes … this is an awesome opportunity for all concerned.

The grant requirements demanded a focus on middle and high school teachers and students, computer programing, and a STEM learning emphasis. You’ll note by the name of the grant (see the title of this post) that the grant department folks that helped in editing, implored me to mention as many aspects of the program as possible in the title.

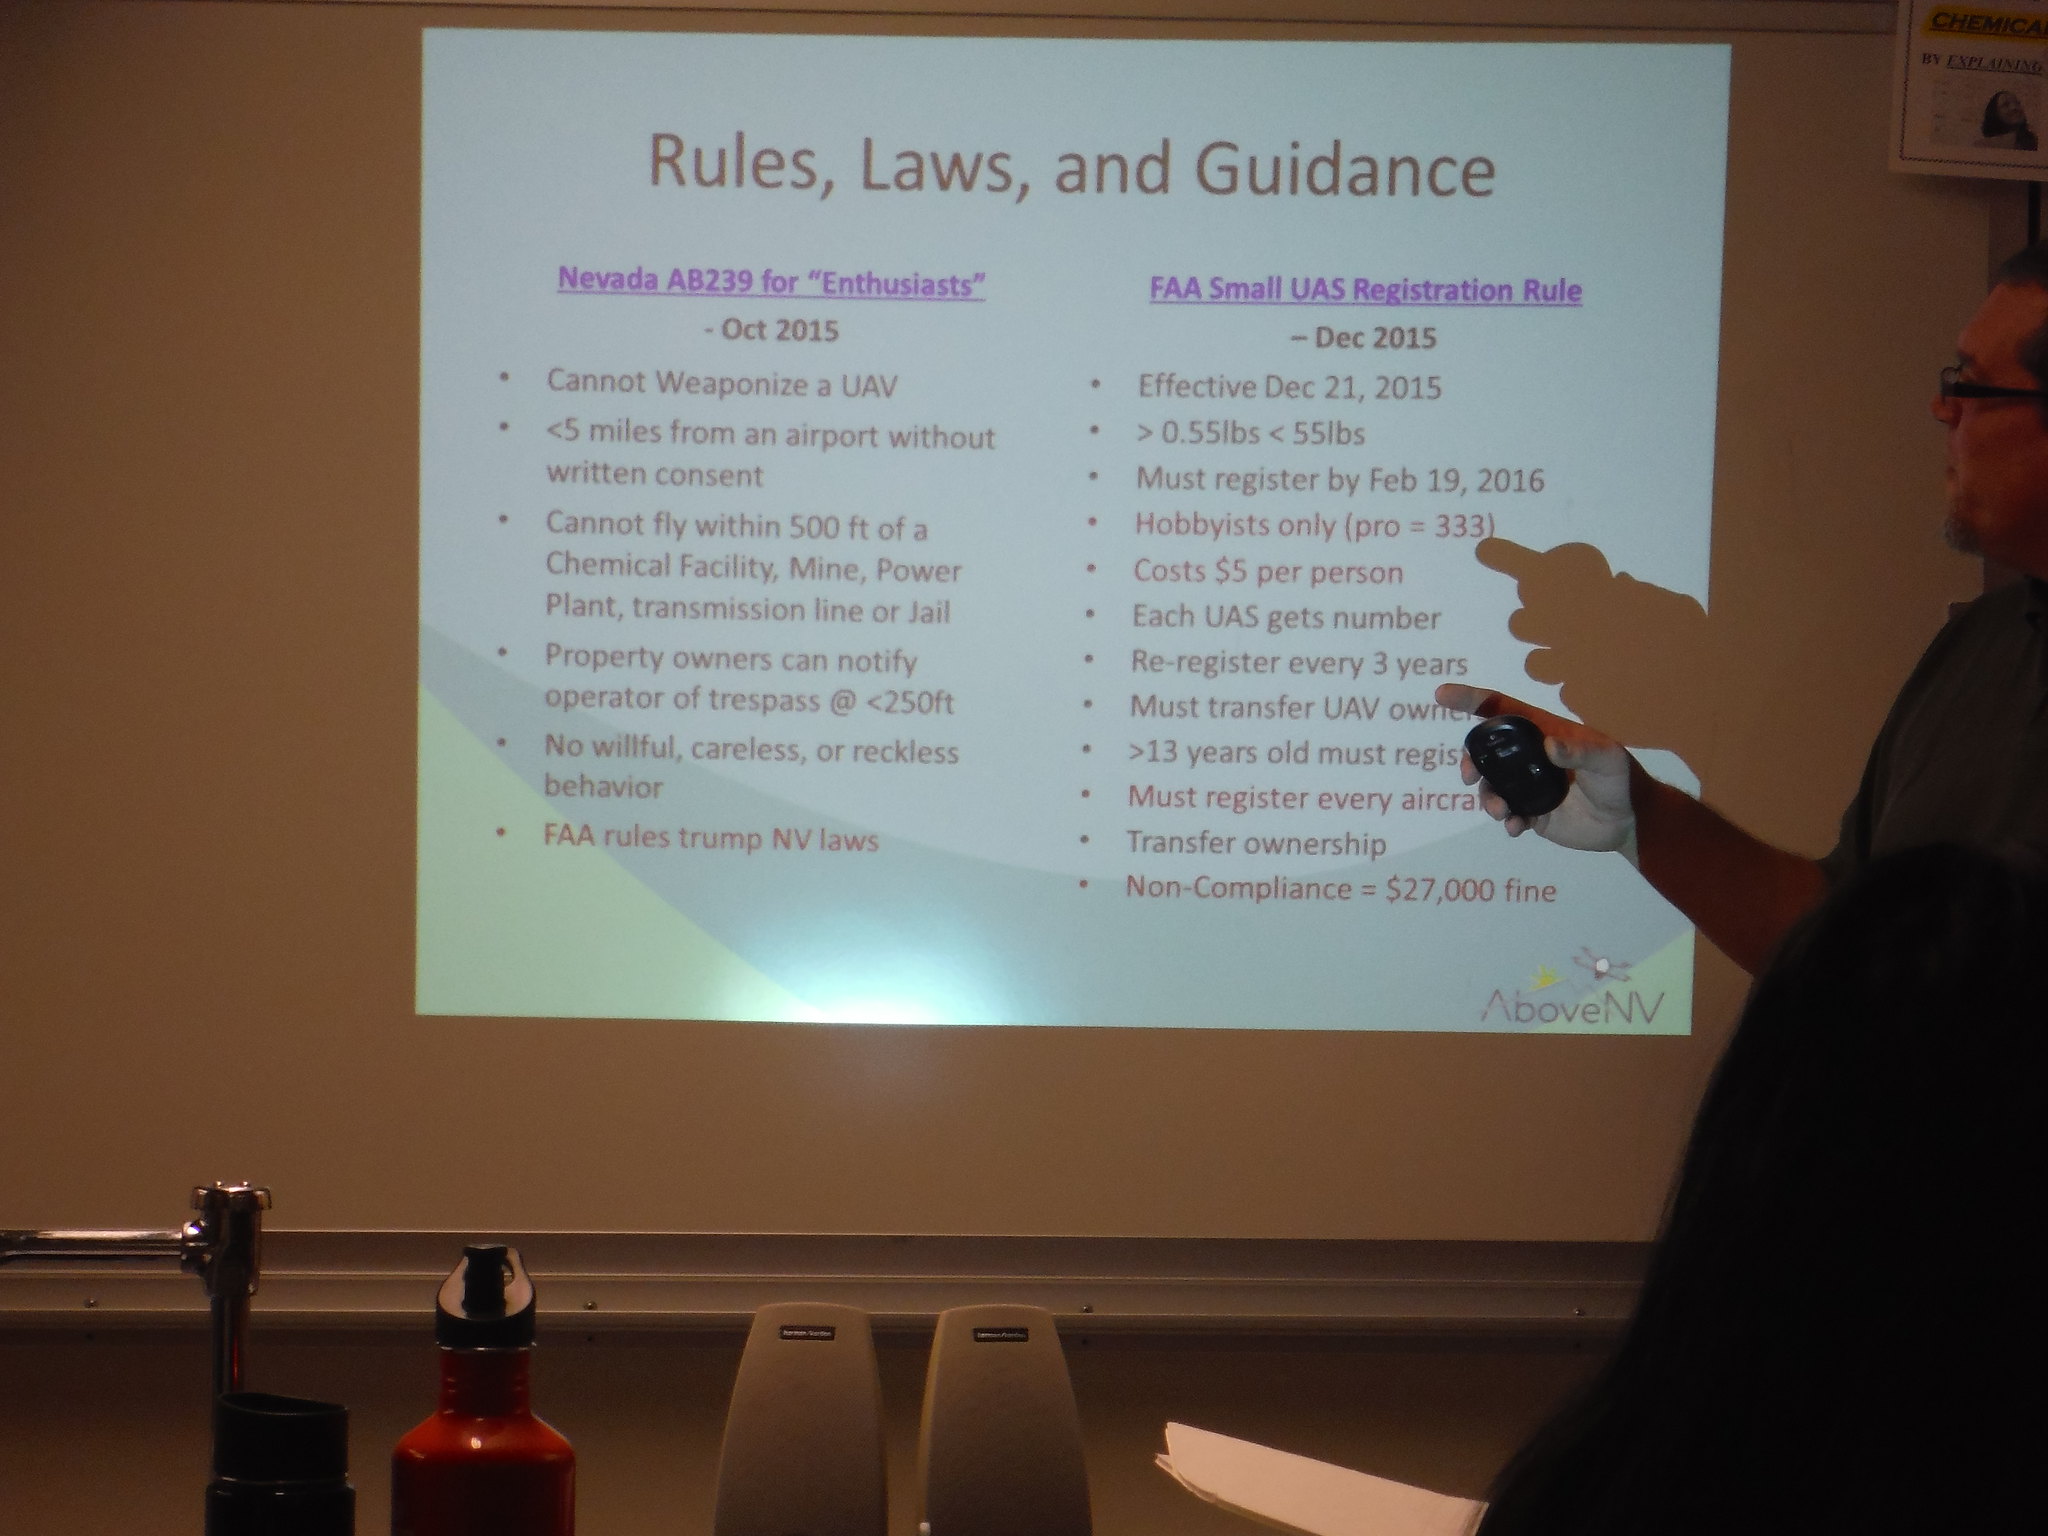
The choice of underwater and aerial vehicles was an easy one … Nevada has been designated one of 5 states where regulations about drones have been eased to encourage research, testing and innovation in drone use (the fact that Nevada contains huge expanses of open land and 4 seasons of weather may have helped). In addition, with the emphasis on encouraging students to study computer programming … and the fact that these vehicles can be programmed … using drones in class to motivate students to engage in both seemed like a perfect match.

CgDx3-2UAAMh6Et
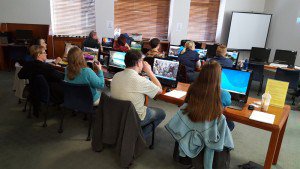
24 teachers, 2 middle school and 2 high school teachers from each of the 6 school districts I serve will be chosen to participate. We will start by doing 2 days of computer programming and 3D modeling utilizing the ncLab online course guided by its developers (a local startup company). Just enough to get teachers started in programming, but also to acquaint them with the online course since it will be available for them and all their students for the next year. I felt that if teachers had even some experience with programming and the online course they would be more likely to use it with their students. Students will have access to the course at school, but also at home or anywhere they can get online, so they can go as far as they like.

Each teacher will receive a Parrot Minidrone Rolling Spider – the kind you control with your phone or pad device, and a waterproof (to 10 meters) and drop proof (from 1.5 meters) digital camera to archive their learning in the institute and student learning in their classrooms. ParrotMiniDrone

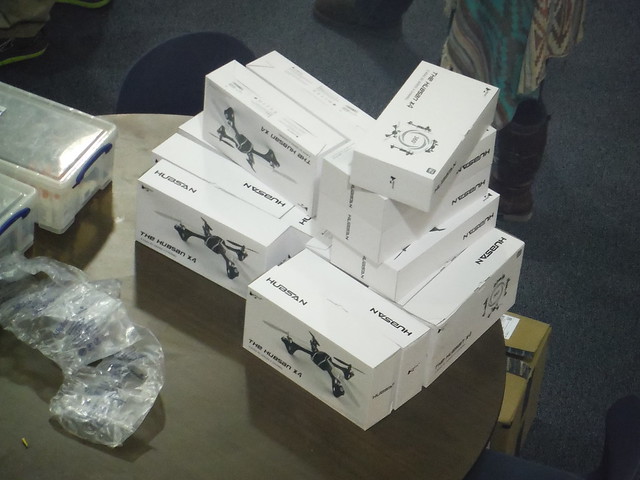
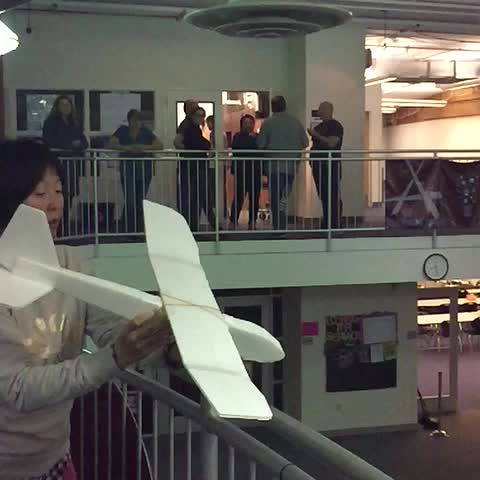
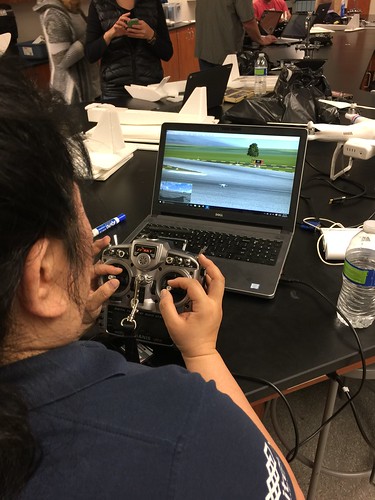
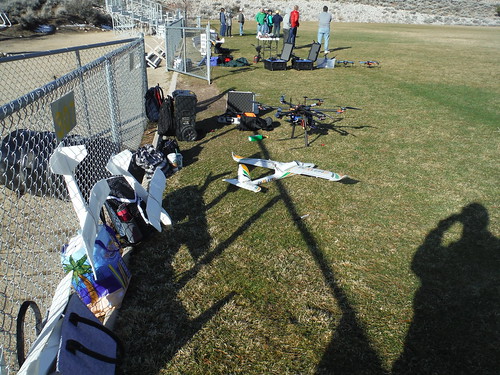
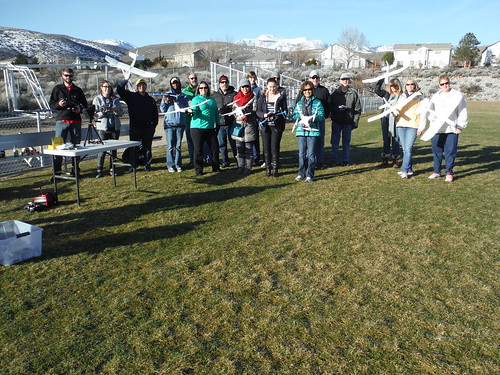
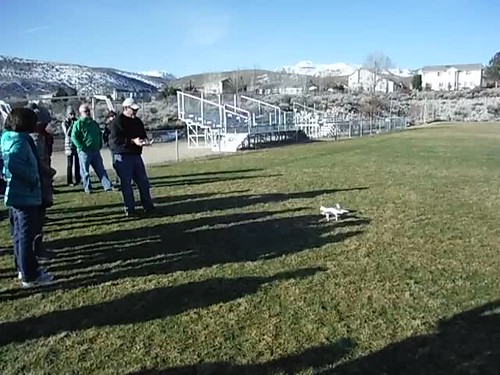
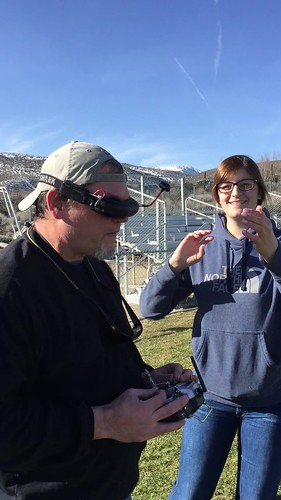
Next, teachers will spend 3 days learning about aerial vehicles from Kirk Ellern (a former high school physics teacher) at AboveNV – a local startup. They’ll fly their “Parrots” and learn how to program them (after the institute they’ll have 4 sets of 10 Parrots they can check out for use in their classrooms). After that introduction to aerial vehicles we’ll move on to Phantom 3 Advanced drones. Here we will put the programming we learned (and note what we want to learn more about) in the ncLab course to work. Four sets of three Phantom 3 drones will be available for checkout by participating teachers forphantom3-drone-300x200 
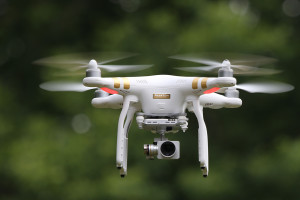
use in their classrooms.

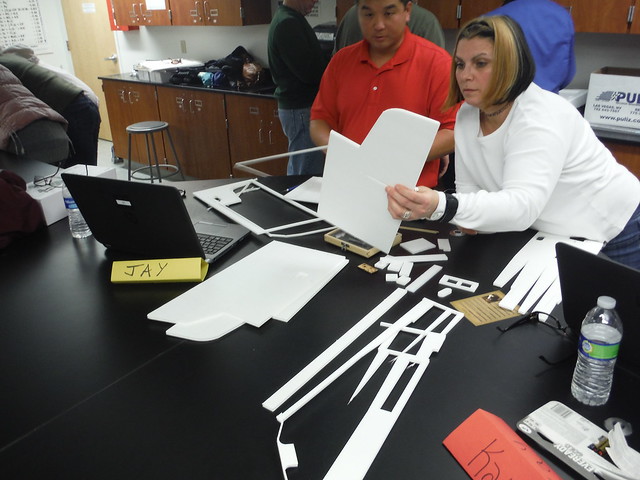
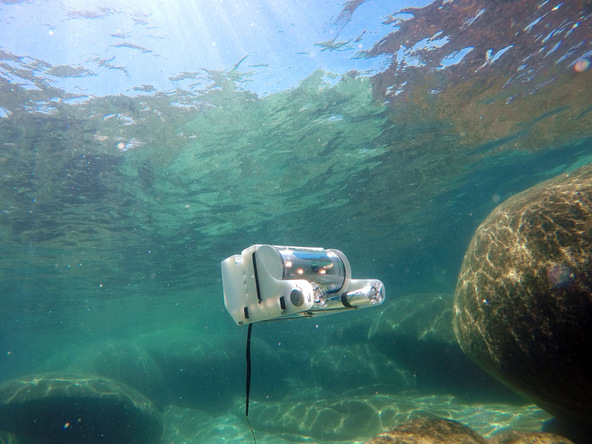
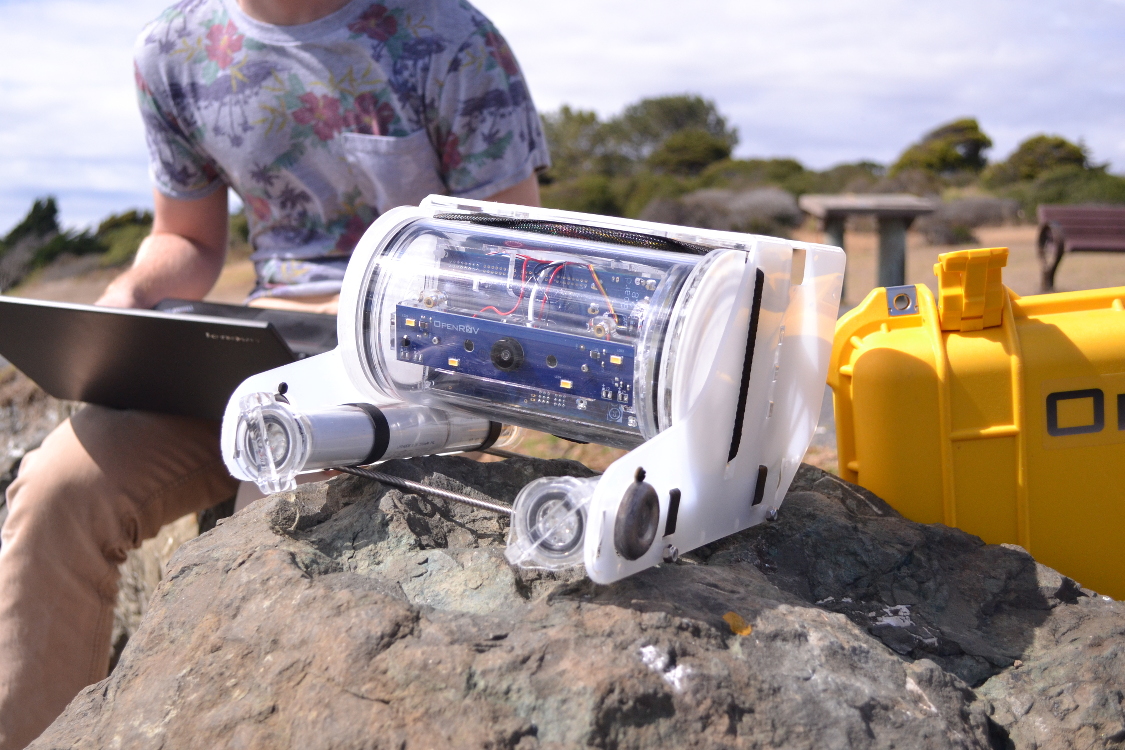
The next 5 days of class will be spent partially assembling and utilizing OpenROV 2.8 underwater vehicles. “Maker skills” will be emphasized as teachers will be taught soldering, wiring, gluing and more to prepare the vehicles for use.  6 OpenROV 2.8’s will be available for checkout by participating teachers. The 2.8’s are operated using a laptop and tether and are capable of depths up to 100 meters. They come with a camera – video/photos and sound can be recorded on the connected laptop … there’s even room for small payloads for doing research – another opportunity to use those computer programming skills as well. Alex Forrest from the Tahoe Environmental Research Center and the University of California, Davis, will lead this portion of the class. Alex has done research in Lake Tahoe utilizing those big “torpedo sized” vehicles you’ve probably seen on the news. He is just back from 3 years in Tasmania.

OpenROV 2.8 Underwater Vehicles

DCIM100GOPROGOPR7566.

DSC_0243


Throughout the school year the course instructors, all specialists in their fields, will be available to consult teachers, visit classrooms and provide follow-up instruction – to me this is a key component of the grant.

Field trip buses will be paid for so participating teachers can take their classes to a water source (lake, pond, wetland, river/stream pool) to operate and do research with the OpenROV’s.

The institute should start up in August and the initial classes will be done by October. I’ll post updates here. I’ll also set up YouTube/Flickr/Wiki and other accounts to archive our progress.

Learning is messy!

Cantilever Spans Supplies / Cost

WashersPaintsticks


For those of you that have been in my trainings or read about our cantilever spans lessons, and wondered about supplies for them, I recently ordered 100 pounds of washers ( two 50 pound boxes – about 2200 washers total) and 1,000 paint stir sticks (or really as I found out paint “paddles“) and today they came in.


WasherBoxThe washers cost $254.00 ($127 per box) and 1,000 paint paddles printed on one side were $125. (NOTE: blank paddles were about $85 per 1,000). The washers we purchased locally at R&E Fasteners in bulk. The paint paddles we purchased from American Paint Paddle Company.

You don’t need this many for just one class. This is enough washers to make at least 3 class sets of washers – that’s 8 bags of washers per class (1500 grams per bag – around 75-85 washers) 1,000 paint paddles is enough to make 66 sets of 15 per set (That’s enough for 8 classes)

(These numbers are based on 8 groups of 2 – 4 students, per class – so a class of 32)

This is a typical set for a group of 4 students along with a tape measure and data recording sheet to keep track of length measurements.

This is a typical set for a group of 2 – 4 students along with a tape measure and data recording sheet to keep track of length measurements. 1500 grams of washers is a usable, general amount, enough to build a structure, but limited enough to encourage re-engineering to strive for more length. However, depending on circumstances, we sometimes allow more to almost unlimited amounts.

(NOTE: In the past we have gotten paint paddles for free from one of the big box hardware stores I won’t mention here (*see bottom of page). Not wanting to count on always being able to get free paint paddles we checked into the cost (see above), which is fairly doable if the free option isn’t available. The materials should last for a long, long time as well, there isn’t a repeated cost every time you do the activity.

The washers are fairly expensive, about 11 cents each if my math is correct, so we are always on the lookout for a free or really cheap alternative. Please share any ideas you might have.

Remember – much more on this lesson available here – cantilever spans lessons.


Learning is messy!


  • Home Depot is the place …  Lowes, and other stores’ paint paddles tend to be warped, not straight, we’ve tried them all. So you can ask at your local Home Depot – we’ve had success when we explain what we are using them for.

New STEM Lessons / Activities Wiki

STEMLessonsActivities


Per request I recently set up a new wiki page as a kind of “clearinghouse” of the different STEM lessons and activities I write about on this blog and elsewhere to make them easier to find. I’ll update it regularly and perhaps add support links for the different lessons as well. There is also a link to the wiki on this blog under the link at the top of this page “STEM Lessons/Activities.”

Learning is messy!

NASA Pathway to Space – Drone Edition

Rockets and High Altitude Ballooning Yet To Come

PathwaystoSpace2015_Inservice_pdf I announced the NASA Pathway to Space class for teachers about a month ago:

“Starting next week a team of educators (including me) will be providing a class for local teachers of grades 3rd – 12th which will include hands-on training in building and flying drones, rockets, planes and designing payloads which we will then launch on a high altitude balloon to somewhere between 65,000 to 100,000 feet.”

I mentioned at the time how, along with the training, teachers would receive a drone (UAV) and build and keep another as part of the class. The first 4 classes focused on drones. Not just building and flying them, but on the laws and ethics that teachers and students must take into account in using them.

Below: Kirk Ellern from “AboveNV” explains some of the rules and laws around drone or UAV use. DSCF0289

  DSCF0312

Above: Participants getting the hang of flying their new drones (cost just less than $50 including remote). 

Learning to fly the little drones is actually more difficult than the larger ones which is why Kirk Ellern and Rob Dunbar from AboveNV suggested using them. “If you can control one of these little fairly indestructible guys, piloting the larger ones is relatively easy.”
DSCF0329


Next, each participant built a “chuck” plane from a kit – so named because you throw or “chuck” it to make it airborne. However, these planes are designed to have a motor, remote control and more added to them if one wishes to do so.

  DSCF0350 

Teachers building their planes, YouTube videos demonstrate each step of the building process.
Untitled
HOBC8940


Above: A first flight

So they’d be ready to fly larger drones they were given time with flight simulator software.
Untitled

We designed this class so that we meet on 2 to 3 Tuesday evenings to learn about and build drones, rockets, balloon payloads and then on a Saturday to fly what we’ve learned about and built. We were ready now for our “Drone Saturday” – so we met on a soccer field at a local high school and thanks to “AboveNV” and friends bringing multiple drones of all sizes we learned about and flew drones for hours. This included flying some while wearing goggles that see through a camera on the drone, so you are flying the drone like you are onboard.

DSCF0535

  DSCF0524

DSCF0531

  IMG_5365

IMG_5367

We really lucked out in that there was not a puff of wind all morning which made it easy to fly all the different sizes and types of UAV’s (Unmanned Aerial Vehicle) we had available. Here’s a link to all the photos from our “Drone Saturday.”

Up next is rockets!

Learning is messy!

As Promised …. Cantilevers With Students

STEM and STEAM

Untitled

In my last post, where I tried out including an art component to this powerful engineering problem with cantilevers on teachers, I explained that as soon as I could try it out with students I would get back about how it worked. Fortunately one of the teachers in that training volunteered his class.

The first challenge 5th grade students received today in Dan Scurlock’s class is seen to the right:

As always students are given as little explanation about how to build a cantilever as possible. I use one paint stick and one washer and show them how you can get more length off the end of the table with the washer on the end. That’s it … now it’s all up to them. Students worked in pairs. I lent a camera to each pair to archive their progress. Link to Flickr set of their photos.

Untitled

In addition they collected measurement data each time they added length to their span with a measuring tape … measurements in centimeters.
Untitled

Untitled

They worked initially for about 20 minutes. There was lots of “messy learning” as students learned about the materials (washers and paint stir sticks). Crashes to the floor were followed by a mix of disappointment and excitement.

Untitled At the end of the first 20 minutes each pair was given a large “sticky note” to post the data from the longest span they had engineered. DSCF0182


We displayed these on the board and then after some discussion (I’m not sharing it all here for brevity, but the debrief is a powerful aspect) the students decided it would be a good idea to order the data from least to greatest. So we did:

Untitled

Next we did a “gallery walk” around the room so students could check out the designs others had come up with, and we had them point out design features that seemed to lead to longer spans.

Now that students had some experience with building spans, I had them take what they had learned and asked them to try to build even longer spans. They enthusiastically got back to work … a few adjusted spans that were still standing from the first experience, but most started over from scratch.

It was apparent right away that they had learned not just techniques, but confidence too.

DSCF0472

After an additional 20 minutes or so we collected their data on a different color sticky note, posted them and compared results:DSCF0520

When asked to compare the data, students noted how the shortest span from the second experience was almost as long as the longest from the first. The data is rich with analysis possibilities (that I won’t go into now, but may add later, especially if you bug me, 🙂 ) and I can share from doing this numerous times that 90cm is short of the longest spans students have accomplished (even K/1st graders will build longer spans given repeated experiences).

We used this data sheet to begin figuring out how much their cantilever span would cost if you set a price for materials (easily made grade level specific by changing the numbers used), but I wanted them to figure out what to do with the data themselves and we didn’t have time … and Dan was excited about the prospect of crunching that data later when they had time to really go deep with it. NOTE: This photo doesn’t show the last line that asks for cost per centimeter.DSCF0058Lots and lots more to do … more investigations trying to make their spans longer …. other ways to analyze data … how to construct the most “cost effective” span and more. But not today.

The STEAM Challenge: And then I explained the word “aesthetics” and how often designs and products and architecture incorporate aesthetics to make them beautiful and even more functional. I used my iPhone and a box that pens came in as an example … “… the box and phone are about the same size, and the box shape takes no real extra, possibly expensive, design time and effort, but the rounded corners and thin profile and other aspects of the iPhone make it more visually appealing (“cooler”), easier to hold, easier to put in your pocket (etc.) ….”

“Now your challenge is to build a structure that is still a cantilever, but how long it reaches off the table is not as important as how “aesthetically pleasing” … how beautiful it is. I’ll even supply you with extra materials if you run out before your structure is finished.” (Note, as students “finished” their structures, one extra challenge I gave them was to see how far off the table they could really get it … and they had fun pushing the limits until it crashed to the floor. NOTE: students had been working now for over 90 minutes and it might have been best to stop here if not earlier – but I wasn’t going to be able to come back soon, and Dan really wanted them to have this experience. But when I was done explaining this investigation it re-energized the class … they were very enthusiastic about jumping back in. Here are some of the results:

  DSCF0517

DSCF0503

  DSCF0495

DSCF0483

  DSCF0505

This group was super excited when they figured out theirs was transportable! 🙂 DSCF0514

  DSCF0512
I just happen to be shooting a photo of this one when it collapsed!  Untitled

Imagine if students had more than 20 minutes and/or re-visted this experience on other days!

Check out more examples by following the link above to their Flickr set as well as this one and this one.

Before I left I explained that I would leave all the materials with them for a few weeks so they could continue their investigations. Cheers ensued. Dan said he would share more photos and feedback on what they did AND he suspected other teachers (some had even stuck their heads in to see what was going on) just might want to borrow them as well.

Learning is messy!

NASA Pathway to Space Class

PathwaystoSpace2015_Inservice_pdf

Starting next week a team of educators (including me) will be providing a class for local teachers of grades 3 – 12 which will include hands-on training in building and flying drones, rockets, planes and designing payloads which we will then launch on a high altitude balloon to somewhere between 65,000 to 100,000 feet. The class filled in one day.

This is the second NASA Pathway to Space class we have offered, but the first to include drones. Last year’s class included rockets, planes, tissue balloons and a high altitude balloon experience as well.

We love providing Professional Development like this where we not only train teachers in the building and flying of the various “vehicles” – but also provide them with the materials and support to make it happen with their students as well. Teachers will either get their own drone as part of the class, or be able to check one out depending on our funding, but also planes, rockets and a balloon launch their students can utilize to send payloads they design up to near space.

Funding for the class came from a NASA Space Grant that includes funding for a second class next fall – so local educators watch for the announcement for that class, probably in late summer. Lots of hands-on messy learning for both teachers and students … my kind of class! 🙂

Learning is messy!

Waterwheel Challenge – or Ricewheel Challenge

A Maker / Engineering Inquiry Lesson

I endeavor to post lessons here I’ve observed or facilitated when I find them valuable. I’m not always successful in posting them quickly, as my bloated draft blog post file will confirm … as will my constant frustration these days with lack of writing time. But this is a really good one, so I felt extra motivated to get it out there.

Grade level-wise, depending on how you set this up, this could really be a Pre-K – 16 lesson. There are many, many ways to take this, including which variables to control for and the goal of the inquiry. In this case it was lifting weight, but it could be speed or number of turns per specific amount of rice (I share a few ideas below). You could charge for materials (a common way to bring more math/data into the inquiry) and challenge students to get the biggest bang for the buck. Anyway here is the challenge:

WaterWheelChallenge


(We substituted lifting 150 grams of weight for the 15 washers.)

As part of an energy project one group of my 5th graders, a few years back, designed a waterwheel and we actually ran water through it which was messy (usually a bonus for me), and caused the waterwheel to fall apart when the materials got soaked … which is a great challenge for them to overcome on the one hand, but a real time suck you might not want on the other. You decide. To overcome that issue Dr. David Crowther, from the Raggio Research Center for Science, Technology Engineering and Math, borrowed an idea he got from elsewhere, tweaked it some and therefore we used rice instead of water to power our “waterwheels.”

Materials2


Here are the materials the middle and high school science teachers participating in our training had to work with. They could only use these materials, but we didn’t limit them in the amount which could be another challenge to overcome.

They also had these wood dowels to use as axles, note the dowels were of various circumferences and participants could choose any size or even change axles (some added tape and even pulleys made from paper plates to make the diameter larger for example ). Dowels


Participants formed groups of 3 and got right to work. One requirement was that groups had to develop a written plan and sketch before they could start construction:


WaterWheelSketch


WaterWheelBuild2


WaterWheelBuild1


WaterWheelBuild3


After 45 minutes of initial design and construction time each wheel was tested. A large plastic trash bin was turned into a test facility by taping 2 large washers to the top that the dowels fit in.

WaterWheelSetUp


WaterWheelPour


The challenge was to lift 150 grams of weight as high as possible with 2 liters of rice. Here is slow motion of one wheel. Note the weights being lifted:

After an initial trial participants were asked to improve and redesign their waterwheels. Then we did one more trial. Here was the winner:


Next we increased the weight gradually and this same design won by lifting 500 grams about halfway. In the classroom what we did in about 2 hours would probably be 2-3 days. And you could easily go much, much deeper. Possibilities include, but are in no way limited to:

  1. Examining the best designs and then having everyone start over from scratch. BTW, the slow motion was shot with my iPhone. Think of using that feature to really see what is going on to help in redesign and also how you pour the rice. Slow motion has implications for data collection leading to redesign in many activities!
  2. Using the same waterwheels but change the task to spinning the fastest with no weight attached … did the designs that lifted the most weight spin fastest? Why? Why not?
  3. Start over and design a wheel that spins fastest as the goal.
  4. Allow different materials or limit materials even further.
  5. Increase and/or decrease the amount of rice allowed from 2 liters.
  6. What design uses the least amount of rice to pull the given weight to the top?
  7. One photo above shows a design utilizing a pulley made from paper plates. That design failed as it could not develop enough torque to overcome the extra load the pulley provided. Can you design a wheel that would work with the pulley (they didn’t have enough time to redesign in this case).
  8. Thinking of the pulley example, can you attach something else that the pulley would cause to turn? Perhaps transforming the lift into some other kind of work or energy? Turn an electric generator? Pump water?

Please add your ideas in the comments.

In addition, as I’ve stated many times, this kind of learning is also a powerful integration to other subjects – collect data and crunch it in math, write (and blog to share!!!) about the procedures, learning, data, what was interesting … and perhaps invite/connect with students elsewhere to participate and share their experiences, data, photos. Lots of powerful ways to integrate technology as well – photos, video, blogging, wiki pages, video-conferencing between schools and more. Creative writing stories from the waterwheels point of view explaining what the experience was like for them … this again makes students have to be very observant about everything that happens to the wheel so they can accurately explain what the wheel experiences with lots of description. “When the tiny white grains of rice hit me I was taken by surprise, and at first the grains felt like tiny stinging bees, but I quickly got used to the sensation and then was exhilarated as I began to turn and quickly picked up speed ….” History lessons tied to the development of waterwheels in history and their impact on society. Are waterwheels still being developed in new innovative ways? So much here to research and learn from.

Learning is messy!

Some Thoughts About The “T” in STEM

And Technology Integration In General

In several of my presentations on STEM Learning I share how it seems some grade level planning sessions approach STEM.

X   Science – “We have science twice a week now for 30-45 minutes.” “Check”

X   Technology – “We go to the computer lab once a week for 30-45 minutes and run apps on the school iPads in class occasionally.” “Check”

X    Engineering – “We’ll fold paper airplanes the last 30 minutes on Friday, fly them, then refold them to see if we can get them to fly further.” “Check”

X    Math – “We do math every day!” “Check”

“LOOK! We’re a STEM school (or grade level) and we didn’t even know it!”

There are several (at least) major issues with the above scenario, but this post will deal mostly with the technology piece. I’ll just say it right up front. When I visit schools, attend trainings or presentations that purport to be about “model,” or even just “pretty good,” STEM learning programs, what I mostly see are what I’ll call “SEM” learning programs. I’m not saying there are no good STEM programs, just what I mostly see is “SEM.”

Why no “T”? The technology use/integration I observe is usually poor … often just an afterthought or so we can say it was there, rarely used powerfully, rarely used as a collaborative/connecting piece, rarely used beyond fairly mundane, “instead of a pencil,” …  “to look something up” kinds of ways. There is some interest now in using computers to “code” or program using computers, and that is definitely a good thing, but not if its just during “The Hour of Code“. One issue is some STEM programs teach that anything from a rock, stick, pencil or paper cup, if used thoughtfully is technology (which is true) … but then pretty much anything anyone ever does would involve technology. But I don’t think that “T” in STEM was included with that in mind. DSC06565

Blogging and video conferencing and making a web page or podcasting or producing a video or programming and any other way someone might use technology are OK. But if they are not being used consistently to produce, analyze, problem solve and share, its a bit like dieting to lose weight a few days a year.

I see time and again students involved in inquiry and other lessons that involve data collection and drawing conclusions and more, but that’s where it ends. Often these experiences are engaging and motivating and kids are excited and we end right there. We have the students right where we want them, where they are motivated and have reason to analyze and learn more about what happened … and to get there they should be discussing and arguing and deciding (maybe agonizing over) how and what to post that their data and observations showed AND their conclusions.

Now, how best to share that? (another creative problem to solve). It involves that “making” piece online.” What are we going to “make” to publish our learning, and how can we make that piece engaging as well? Something we can create that will make others want to learn what we learned and perhaps converse and even collaborate about? The process of sharing learning is often where misconceptions or errors in trials, basic understanding or data collection arise and can be dealt with.

I’ve found that this is when students relive what they did and get excited about it again (even though this is hard work). Partly through the give and take and creative release from designing and writing a program or producing a video/podcast/blog post/captioned photo or whatever, and since they have shared … now they have the opportunity to discuss and perhaps collaborate (if that wasn’t already part of the learning) with others … perhaps experts they or you have found to share their work with, or just others that come across their posted results, … there are so many possibilities here that utilize that “T” in powerful ways that stress problem solving, communication and collaboration … and too often this vital learning is left behind. Perhaps because it’s value is not understood or valued and because the perception is that, “We don’t have time.”.

I’m not saying you to go this deep EVERY TIME, but MORE of the time for sure. It is how technology actually becomes a powerful learning tool.

I emphasize all the time how all those publishing and analyzing pieces are what make a solid STEM program the best ELA and math learning your students will do. But not if we leave it behind. It’s hard work on the students’ and teacher’s (facilitator’s) part … and it is time consuming … and we have that incessant “tick, tick, tick” that time is going by and I have to get through this and move on! Maybe just to get done, or worse so we will be ready for testing. But this is the “messy” learning our students deserve. Publishing to the world is another reason to be accurate, clear, concise, creative and much more.

What are your thoughts?

Learning is messy!


Use Powerful Tools Powerfully

Over the years I’ve had the pleasure to work, via various social networking sites, with Kathy Cassidy, a teacher “of six year olds,” in Saskatchewan, Canada, according to her class blog. We’ve even met face to face at conferences. My class (4th – 6th graders) shared blog posts and comments with her students a few times, and we Skyped at least once. Kathy recently shared a post on the Powerful Learning Practice blog about “Five Ways To Use Skype.” Some of the aspects of the post I want to highlight are that yes, ‘even’ 6 year olds can connect online in ways that provide powerful learning opportunities for them, and Kathy makes the point that, “If we are going to use technology, we need to use it well.” Check out her post, she shares some great ideas on connecting your students.

Reading Kathy’s post had me re-visiting a point that has been made by others (and me) over the years, but a point that needs repeating … repeatedly, because it is such a vital point to make.

There are very powerful learning tools available on the “inter webs,” and many are free to use … video conferencing tools like Skype, Google Hangouts … blogs, wikis, online photo and video archive sites (like Flickr), and many more. As Kathy and others point out there are powerful ways to use these tools that connect students, experts, facilitate collaboration globally, provide the ability to design, produce, edit and share content in any subject, and so much more (and yes, occasionally just to do something fun or cool!).

There are many of us that have been working very hard to spread the word about how these tools facilitate new, innovative and engaging approaches to learning. How they require teaching our students to be active learners instead of teaching them to be taught … sit quietly but attentively, raise your hand if you have a question, then wait for me (as the teacher) to decide this is an OK or appropriate time in my lesson to break from my cadence, my lesson, and answer your question or listen to your comment … now … or not.

So what’s my point already? It’s the point Kathy made: “If we are going to use technology, we need to use it well.

Ever since personal computers and other technologies were introduced, their praises as learning tools have been sung from the highest rafters. Unfortunately, much more often than not, when technology has been purchased with improving education, improving student learning, improving student achievement or (yuck) improving student test scores as the goal … the technology or tool has been the focus with too little thought or professional development or teacher autonomy considered to actually use the technology in ways that empower students and/or their learning. The results therefore have been ugly and have lead to a backlash about the actual value of technology and connectedness as pathways to learning.

In addition, the tunnel-vision of test scores in language arts and math have turned too many computer labs and other technologies into drill and practice, test prep and “what apps can we get that will engage the students” dead ends. That use of technology as learning tool is like buying a Ferrari just to listen to the great stereo while its parked in the garage.

There is nothing wrong, especially as a way to gain experience with the technology, to do a video-conference or two that is mostly about saying hi to a class in another state or country and share some basic information. But if that’s all you do … then that’s probably not “using it well.” Collaboration, sharing and analyzing data, simultaneously performing an experiment or activity to see if location changes the results, read alouds between students, an international poetry festival between classes … that’s more like it. Students tend to be more engaged, spend more time editing, ask more clarifying questions … because these students from somewhere else, and maybe others, are going to see it … I want it to be good.

Blogging is awesome! Blogging is writing for sure. But its also posting photos, videos, podcasts, vid-casts … and because blogging is a two way street (because others can leave comments) its a conversation. Students can post any kind of writing you do in class, and yes, I’ve even had them post a written response about their reading. But also creative writing, science experiments, reports on any subject, short stories, long stories, explanations, diagrams and representations of math problems and concepts (that other students from around the world can see, discuss and argue about). But also photo essays, video clips of anything, pieces they write just because they want to (my new puppy, my birthday party, what happened when we got a flat tire, I was so scared when …) … and again, these pieces are published to the world … and the world responds, and that leads to more writing and thinking deeply about the response, and sharing ideas and realizing what is different about living in different parts of our city, state, country, world.

I could go on explaining the power of wikis, photo and video sharing sites and more. But that will just belabor things.

Too often we utilize technology and the web because they seem to be automatically engaging for students .. at least for awhile. If we aren’t learning as educators how and why to use these powerful learning tools and opportunities to enable our students to do important, meaningful work. If we allow ourselves to feel unprepared or stupid or phobic about using technology and perceive that our students know more about it, or worse, see it as a way to keep students busy in the computer lab while we grade papers or do other “teacher stuff.” (yeah I know that you probably don’t get enough prep time). Then we are leaving its promise and capacity as a learning facilitator, connector and collaboration tool on the cutting room floor. We might as well not bother with it.

So as Kathy said, “If we are going to use technology, we need to use it well.

Learning is messy!

One Way To Get More Girls/Women Interested In STEM

(and actually everyone)

This is a subject I see consistently being discussed online and in meetings I’m involved in as part of my job. That is, how do we get more girls/women involved in STEM? I don’t mean for this to be “THE” answer, but part of it for sure, and its not that difficult to implement.

So what is it?

Provide a broad, rich, integrated curriculum that includes science, engineering and inquiry based learning opportunities from an early age. Pre-school is not too early – and it is solid learning, so it should start there – but honestly I got students in 4th grade that came with almost no experience in those areas, and provided lots of STEM and/or project/problem based opportunities for 3 years, and my girls were just as involved, interested and motivated as the boys in STEM (and I know other teachers that have had similar experience).

Perhaps the problem of getting girls/women “involved in STEM” is that too often what we offer in elementary school just doesn’t include much in those areas. And certainly during the “No Child Left Behind” and Race To The Top” eras, the attitude was, and is, to narrow the focus during elementary school to language arts and math, and when students get to middle/junior high school “we’ll catch them up” in science, social studies, art and more (yeah, that’s worked well). AND to introduce students to STEM and “making” and other subjects as late as 7th grade … that’s when gender based biases, because students haven’t become interested before those impressionable, difficult years, become an issue. 7th grade is TOO LATE for students to be just finally introduced to those subjects, pedagogies and experiences.

So again, I’m not saying this one “intervention” would entirely solve the girls/women in STEM careers issue by itself, but I suspect it might be a pretty important piece of it.

What are your thoughts?

Learning is messy!